Difference between revisions of "Sash"
(cleanup tag) |
m |
||
| Line 83: | Line 83: | ||
[[Category:Rulebook Terms]] | [[Category:Rulebook Terms]] | ||
| − | [[Category: Garb]] | + | [[Category:Garb]] |
[[Category:How To]] | [[Category:How To]] | ||
| + | [[Category:Equipment Types]] | ||
Revision as of 16:27, 26 July 2018
| This article may require cleanup. The specific problem is: tutorial copied from external source. Relevant discussion may be found on the talk page. Please help improve this article if you can. (April 2016) |
From the V8 Rulebook
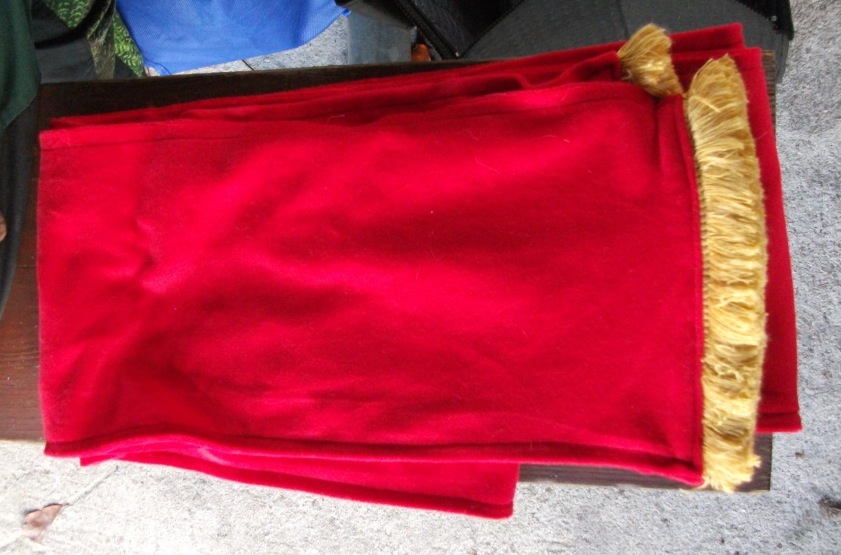
Sashes are used to denote certain classes by their color in games where classes are used. All sashes must be at least 2” wide and be worn from shoulder to opposite hip across the body.
Listing of classes and their sashes

| Class | Sash |
|---|---|
| Anti-Paladin | No sash, Black Phoenix |
| Archer | Orange |
| Assassin | Black |
| Barbarian | White |
| Bard | Blue |
| Druid | Brown |
| Healer | Red |
| Monk | Grey |
| Paladin | No sash, White Phoenix |
| Peasant | No sash, no Garb |
| Reeve | Gold |
| Scout | Green |
| Warrior | Purple |
| Wizard | Yellow |
How to
Since we use these things all the time now, roughly every weekend, you should probably make yourself and your buddies some.
Materials:
Broadcloth is the most commonly used fabric, but feel free to get fancy. You will need a stripe at least 180 long.
Instructions
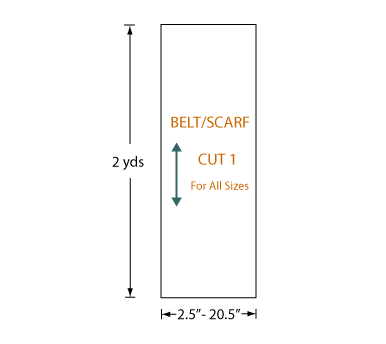
Cut a strip of fabric about 2 yds (1.8 m) long as shown in Diagram 1. To determine how wide the strip needs to be, multiply your desired finished belt/scarf width by two and add 0.5" (13 mm).
Note: Alternatively, you can cut the fabric on the bias. With 44" (1.1 m) wide fabric, you can make a bias sash about 60" (1.5 m) long before having to add a seam.
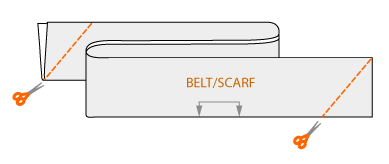
Fold the fabric strip in half lengthwise with right sides together and cut the ends at an angle, as shown in Diagram 2.
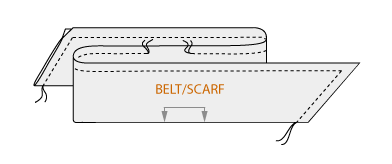
With a 0.25" (6 mm) seam allowance, sew the raw edges together along both angled ends and along the length of the fabric, leaving an opening of about 4" (10 cm), as shown in Diagram 3.
Trim the seam allowances at each corner, turn the sash right side out, and press.
Finish by either (a) slipstitching the opening closed or (b) topstitching close to edge along all four sides of the sash.


