V9: Equipment
- The Amtwiki is the official home and primary source for Amtgard V9 Rules as of February 25, 2023.
- These rules are currently in Open Alpha Playtest. See the Playtest Disclaimer for more details.
- To learn more about Amtgard V9 Development, please visit Amtgard.com.
- To view the current Amtgard V8 ruleset, please see the Amtgard V8 Rulebook.
Contents
- 1 Equipment
- 1.1 Equipment Basics
- 1.2 Equipment Use Terms
- 1.3 Weapons
- 1.3.1 General Rules
- 1.3.2 Construction Terms
- 1.3.2.1 2.5 Inch and 2 Inch Rule
- 1.3.2.2 Core
- 1.3.2.3 Covers
- 1.3.2.4 Flex
- 1.3.2.5 Handle / Unpadded Segment
- 1.3.2.6 Incidental Padding
- 1.3.2.7 Multi-Ended Weapons
- 1.3.2.8 Non-Striking Tip
- 1.3.2.9 Ownership Label
- 1.3.2.10 Padding and Foam
- 1.3.2.11 Stab-Only
- 1.3.2.12 Strike-Legal Padding
- 1.3.2.13 Striking Tip
- 1.3.2.14 Total Length
- 1.3.2.15 Weapon Segments
- 1.3.3 Melee Weapons
- 1.3.4 Projectile Weapons
- 1.3.5 Siege Weapons
- 1.4 Shields
- 1.5 Armor
- 1.5.1 General Rules
- 1.5.2 Natural Armor
- 1.5.3 Physical Armor
- 1.5.3.1 Gameplay Rules
- 1.5.3.2 Construction Rules
- 1.5.3.3 Rating Armor & Calculating Armor Point Totals
- 1.5.3.4 Armor Styles
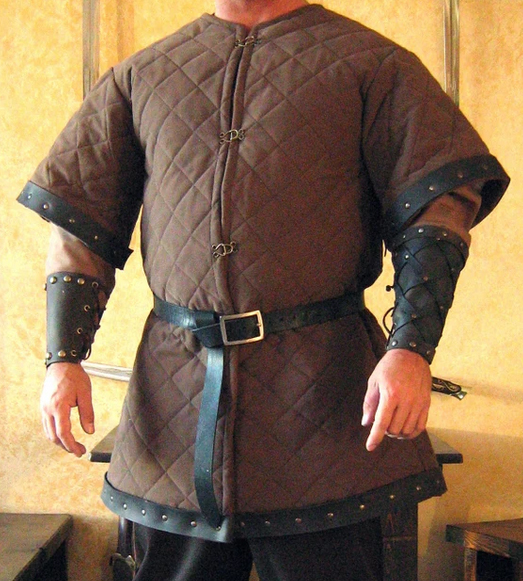
- 1.5.3.4.1 Cloth/Padded Armor
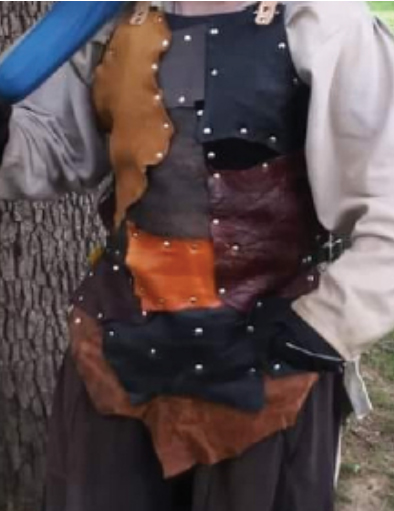
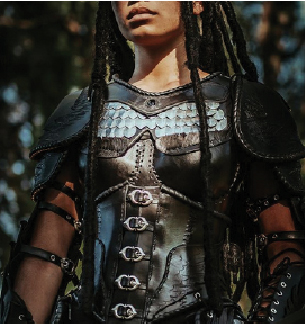
- 1.5.3.4.2 Light Leather
- 1.5.3.4.3 Butcher's Mail, Sharkmail, etc
- 1.5.3.4.4 Heavy Leather
- 1.5.3.4.5 Rigid Non-Metal Armor
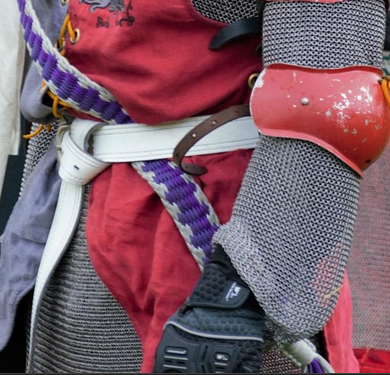
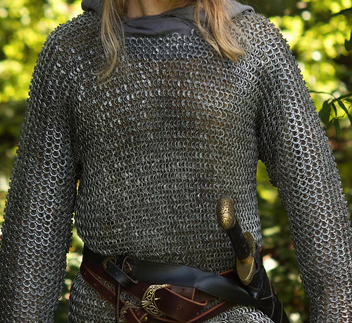
- 1.5.3.4.6 Chainmail
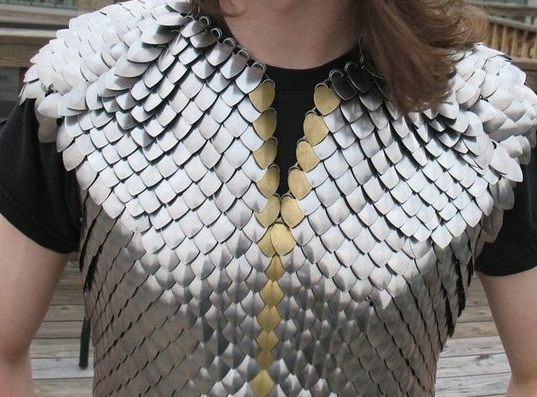
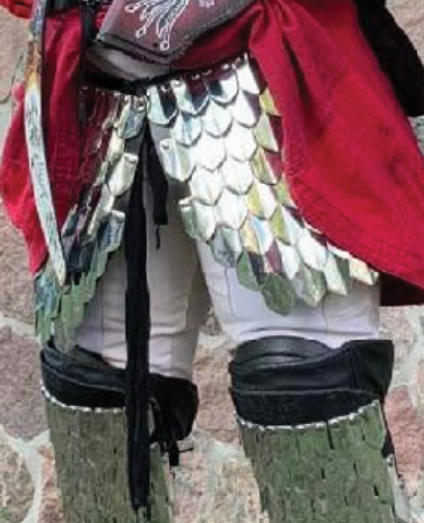
- 1.5.3.4.7 Light Scale
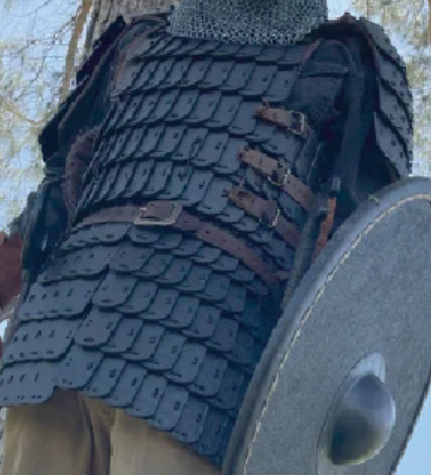
- 1.5.3.4.8 Heavy Scale
- 1.5.3.4.9 Butted Plate (Splint, Kikko, etc.)
- 1.5.3.4.10 Lamellar and Laminar
- 1.5.3.4.11 Brigandine
- 1.5.3.4.12 Plate
- 1.5.3.4.13 Ambiguous Armor
- 1.6 Color Code
- 1.7 Visual Indicators
Equipment
Equipment Basics
General Rules
In Amtgard, the term ‘equipment’ refers to any physical gear or functional items that are used to directly influence gameplay. This includes, but is not limited to, weapons, shields, armor, helms, magic items, and portable game objectives. It excludes garb, non-combat items, non-functional props (instruments, books, etc.) and containers (quivers, pouches, bags, etc.).
- All equipment is the personal property of the player that owns it.
- Players may never handle or fight with the equipment of another player without first having their permission. Players may assist with the recovery of expended equipment (often projectiles) without permission however this must be done with utmost respect and permission can be revoked by the owner at any time.
- Players should never knowingly behave in such a manner that would cause a reasonable player to fear for the safety of their equipment.
Universal Equipment Requirements
Every piece of equipment, regardless of type, must meet or exceed all of the following baseline requirements in order to be eligible for use in Amtgard combat. Equipment that does not meet or exceed all of these requirements cannot be used.
- All equipment must be physically safe for the user and other participants to engage with during the course of combat, including incidental contact, falls, and crashes.
- All equipment must be durable enough to survive the rigors of Amtgard combat.
- Equipment must not significantly degrade or fail during the course of combat, including incidental contact, falls, and crashes. Examples include: equipment so flexible as to risk failure; poor connection points; brittle materials; and so on.
- Equipment must be easily recognizable as the type of equipment it is trying to be and not easily confused for something else. It must also be visually appropriate for the Heroic Fantasy theme of Amtgard.
- Each piece of equipment must meet any construction standards relevant to its type.
- Each piece of equipment must be regularly inspected for all of the above, especially potential hazards and conditions that could risk injury, malfunction, or catastrophic disassembly.
- All weapons must also pass a Hit Test before their first use, and periodically thereafter.
Equipment Inspection
Each piece of equipment must pass an inspection before its use each day to ensure the Universal Equipment Requirements of safety, durability, recognizability, and any other type-specific construction standards are met.
Guidance for Equipment Inspectors can be found in the Equipment Inspection Guide. The following information is the essential knowledge that all players should have:
- Equipment is inspected by an Equipment Inspector. Since equipment inspection is mandatory, this task is often a listed responsibility of one or more Officer positions, traditionally the Champion and/or Guildmaster of Reeves.
- All inspectors are highly encouraged to follow the Equipment Inspection Guide.
- All weapon inspections must include volunteer-assisted Hit Testing.
- Equipment that does not pass inspection cannot be used in combat. Using uninspected or unapproved equipment on the battlefield is grounds for immediate suspension from play.
- Equipment may be reinspected throughout the day as necessary.
- New or inexperienced players wishing to use a weapon type they have never used before must also demonstrate Weapon Competency to ensure safe use on the battlefield. Players who demonstrate unsafe weapon use during this demonstration or at any point thereafter may have those weapon privileges revoked by a Rules Authority.
Equipment Use Terms
The following terminology applies to all forms of equipment.
Carried
All equipment on a player is considered Carried. If something cannot be carried, it cannot be lifted by the player in any way.
Held
Anything carried using one or more hands is considered Held.
Free Hand
Also known as an 'Open Hand', a Free Hand is the hand of an unwounded arm, which is not holding any equipment other than material components required by the action.
Free Hands are most often required to cast abilities and interact with game objectives.
- Bucklers, Small Shields, and Magic Staves will not count against a Free Hand, even while holding the handle.
- Medium, Large, and Tower Shields that are held in hand or worn on an arm will always take up the respective Free Hand, even if they are not actively being wielded or held in hand. The same is true for all sizes of Madu.
- Abilities marked with ⬗ in class customization do not require a free hand for that class to use.
Worn
Equipment attached to or otherwise dressing the body in its intended manner is considered Worn. Physical Armor must be Worn to bestow protection.
Wielded
Equipment is considered Wielded when it is being held in a manner appropriate for its use in the game of Amtgard.
- Equipment must be wielded in order to attack, defend, or otherwise be used for its intended purpose. Certain game types, classes, and special rules will limit the equipment a player is allowed to wield.
- If something cannot be wielded, it can still be held or carried, but cannot be used to perform any function and should not be presented in a way that would suggest it is wielded.
- Players can only wield one piece of equipment per hand. Shields are an exception (see below).
- Players may only ever wield a single Shield at a time, however shields can be wielded simultaneously in the same hand as any another piece of equipment except Bows and Crossbows.
- Medium, Large, and Tower Shields must be held by their handle to be wielded.
- Bucklers and Small Shields must be either worn on the arm or held by their handle to be wielded.
- Shields cannot be wielded while worn like a backpack or strapped to other parts of the body such as the torso, legs, hip, or head.
- Bows and Crossbows cannot be wielded with any other equipment in the same hand (besides arrows). Likewise, other equipment cannot be wielded while in the same hand as a bow or crossbow. A buckler or small shield may still be wielded on the arm so long as there is no risk of it interfering with the safe use of the bow.
- For gameplay purposes, reloading a crossbow does not count as wielding it.
- Thrown projectiles are only considered wielded during the throwing motion. They are considered unwielded equipment at all other times.
- Players may hold Unwielded equipment in the same hand as wielded equipment in situations where it is blatantly and visually obvious which piece of equipment is in use and which one is not. If a player ever visually appears to have more equipment wielded than they are allowed, all the equipment in question is considered unwielded.
- Bows and Crossbows are the only exception to this rule (see above).
Example 1: A player may wield a polearm two-handed while also holding an unwielded flail in one of their supporting hands. The pole can be used as long as the flail is obviously not in action. In order to use the flail the player would need to release the polearm from the flail hand.
Example 2: If a player holds two short swords in the same hand then both would be considered unwielded because it would be too ambiguous which one the wielder is intending to use and which one is just being held, regardless of their orientation. - Bows and Crossbows are the only exception to this rule (see above).
Unwielded
All equipment is considered unwielded unless it meets the conditions for being worn or wielded. In addition, the following rules apply:
- Unwielded Equipment will count as an Invalid Obstruction when struck.
- Unwielded Equipment cannot be used to block line of sight or impede the physical movement of other players or their equipment.
Unattended
Unwielded Equipment that has been at rest on the ground or against terrain for at least 5 seconds is also considered ‘Unattended’ until it is reclaimed by an intended user. Unattended Equipment cannot be destroyed or otherwise affected by gameplay. This has no effect on conditions the equipment had before it became Unattended (ie. a destroyed weapon will stay destroyed even while it is unattended).
Destroyed
Some effects may cause equipment to become Destroyed.
- Destroyed equipment cannot be wielded, used to perform an in-game function, or otherwise generate a gameplay advantage until it is restored.
- Destroyed equipment may still be carried or worn so long as the player notifies their opponents about the state of the equipment as necessary and avoids presenting it in a way that would suggest otherwise.
- Destroyed Armor is reduced to zero (0) armor points in the affected location.
Weapons
Striking your opponent with a wielded weapon is the primary way to interact with them in combat.
General Rules
- Only weapons that meet the Universal Equipment Requirements can be used in combat.
- All Amtgard weapons are classified as either a ‘Melee Weapon’ or a ‘Projectile Weapon’, as well as a specific classification or typing such as ‘Short’ or ‘Long’. Weapons of the same classification have the same gameplay rules.
For example, a ‘ Short’ melee weapon made to resemble a fish will have the same gameplay rules as a ‘Short’ melee weapon made to resemble a Sword or Club. - Unsupported Weapons: In-Game representations of explosives, firearms, and chemical weapons (such as Alchemist’s Fire or Toxic Gas) are not supported by the Amtgard Rules of Play. If something of this nature is desired for a special scenario, a Game Organizer may design and implement custom rules on a game-by-game basis.
- Prohibited Weapons: For the safety and comfort of our players, Amtgard outright prohibits the following weapon styles and their variations. If you are unsure if a weapon design falls under these categories, consult a Reeve or other relevant Rules Authority.
- Entangling Weapons such as Whips, Lasso, Nets, and Bolas.
- Atlatls, Slings, Slingshots, and all other handheld projectile launchers that are not bows or crossbows.
- Punching weapons such as Foam Fists, Punching Daggers, and Tonfas. The experience of being punched is psychologically at odds with the safe, inclusive, fantasy-sword-fight atmosphere that Amtgard wishes to evoke.
Construction Terms
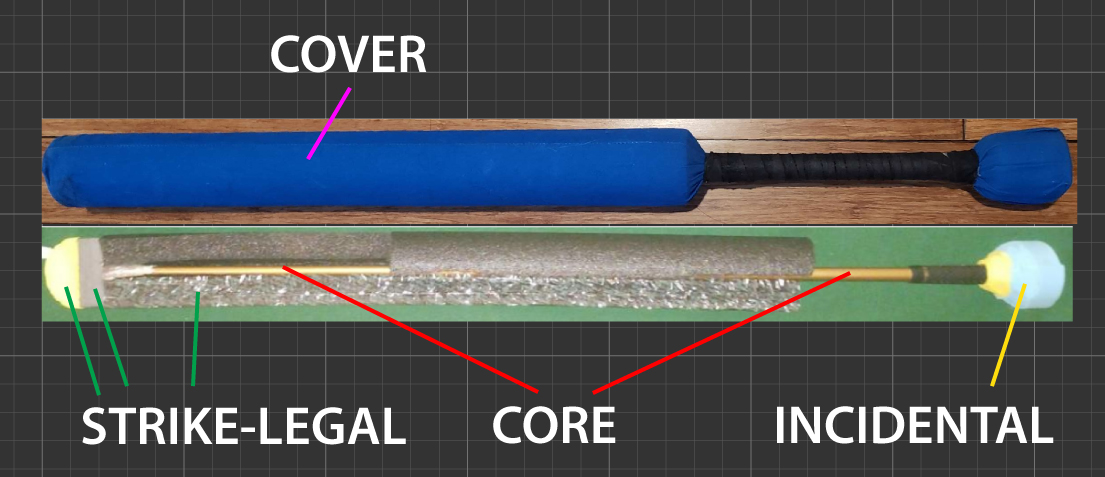
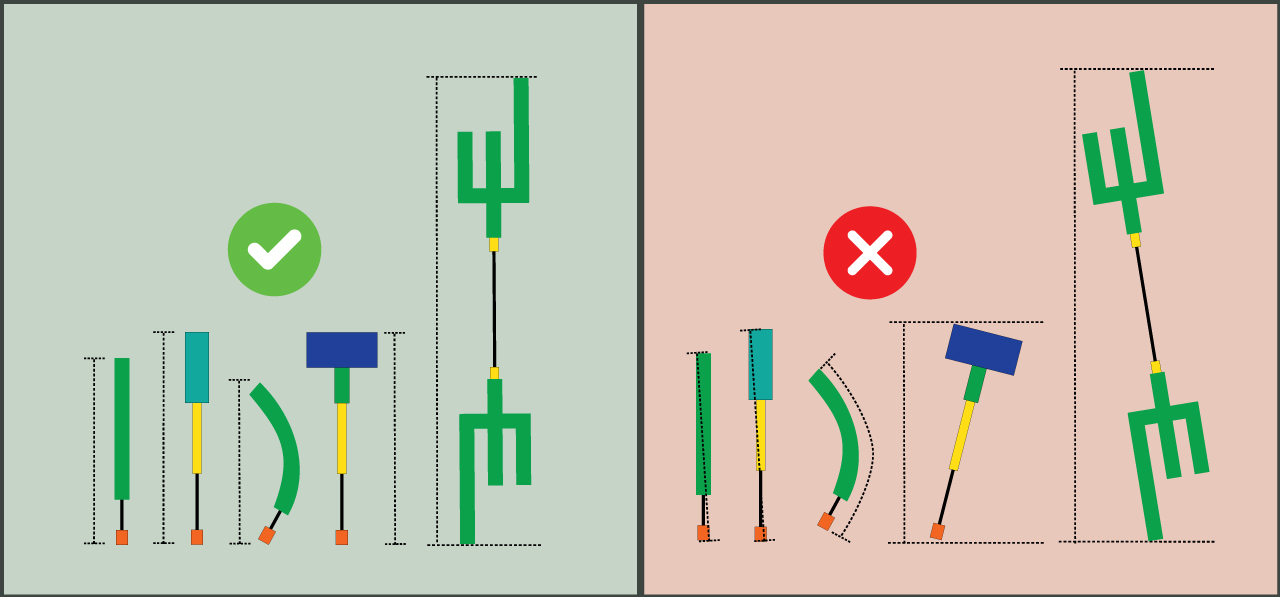
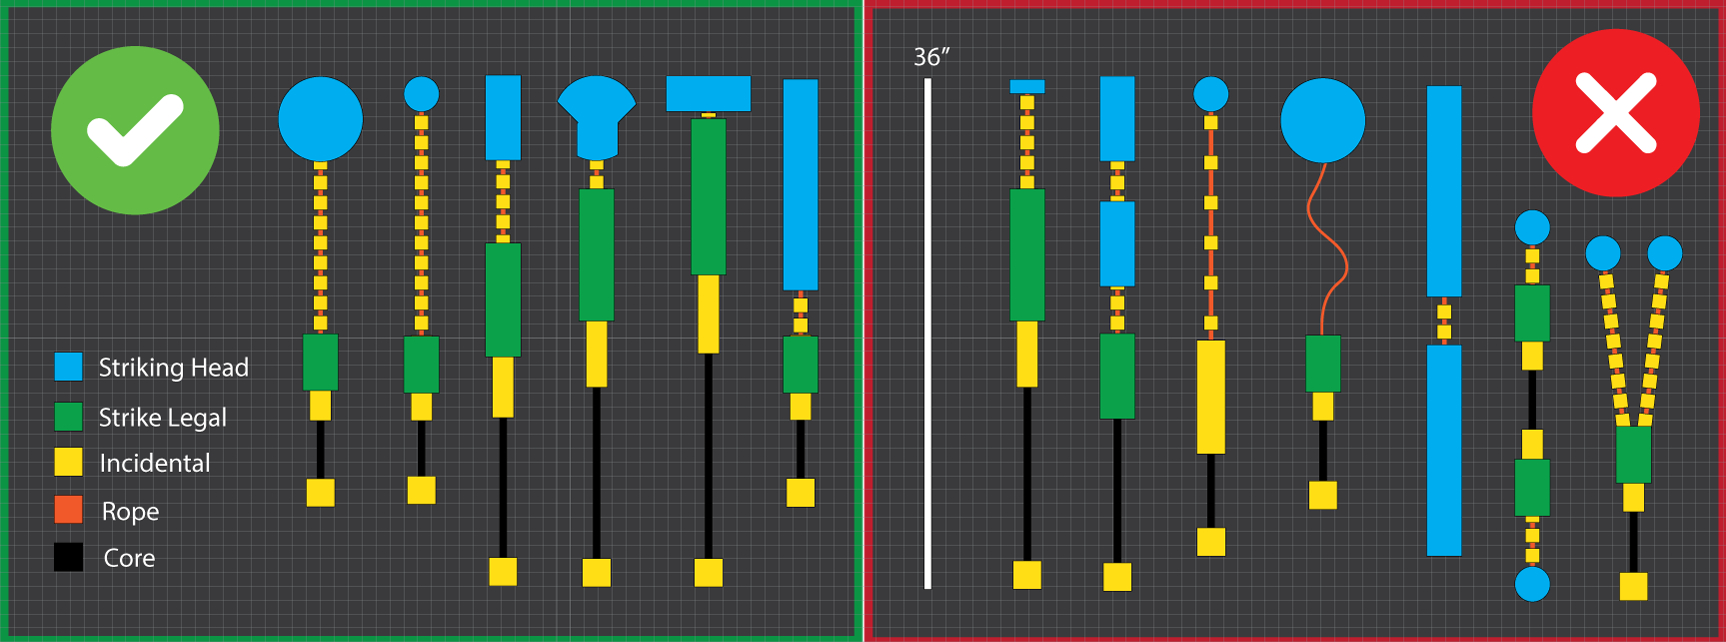
Amtgard weapons are typically made from a structural core padded with foam and a cloth cover. Below is a diagram of a few typical weapons with their component parts labelled. You can read the descriptions for each component below, which are listed in alphabetical order for ease of reference.
2.5 Inch and 2 Inch Rule
- No part of a weapon's striking surface, whether the tip, the edge, the face or any other part, may protrude more than 1.5" through a two-and-a-half inch (2.5") ring when uncompressed.
- No part of a weapon or shield's non-striking surface such as the ends of crossguards or pommels may protrude more than 1.5" through a two-inch (2") ring when uncompressed.
Core
This refers to the structural base of the weapon to which padding is affixed.
- Rigid Cores
Melee Weapons require a rigid core to provide structural stability. Short weapon segments and small protrusions from a central core that are stable on their own do not require a rigid core within them. These segments and protrusions must not deform or fold over excessively during combat and must always return to their original position.- The best materials to use are carbon/graphite rods (such as from non-metallic golf clubs), kite spar, bamboo, PVC tubing, or fiberglass. Other materials will be assessed for safety on a case-by-case basis.
- Metal and wooden cores are prohibited. Metal may be used to counter-weight weapons provided it is permanently attached and not in a place that may inadvertently strike another player.
- The ends of any rigid cores should have a flat face and be securely capped with a layer of foam and tape at minimum to prevent the core from pushing through.
- Hollow cores should be sealed at the ends.
- Sharp edges should be blunted so as to not dig into the padding.
- Non-Rigid Cores
Contact Projectiles require a non-rigid, non-granunlar core.- The best materials to use are foam (any), denim, sweatshirt material, loose rubber bands, etc.
- Unacceptable cores include: Solid rubber, tightly-wrapped rubber bands, tennis balls, beanbags, seed packets, etc.
Covers
All striking surfaces must be covered in a durable, opaque cloth and be visually distinct from any non-striking surfaces. Incidental padding within 0.5" of a striking surface must also be covered in this manner. Non-abrasive cloth tape (not duct tape) may be used for Contact Projectiles but it is not an acceptable cover material for melee weapons or arrows.
Flex
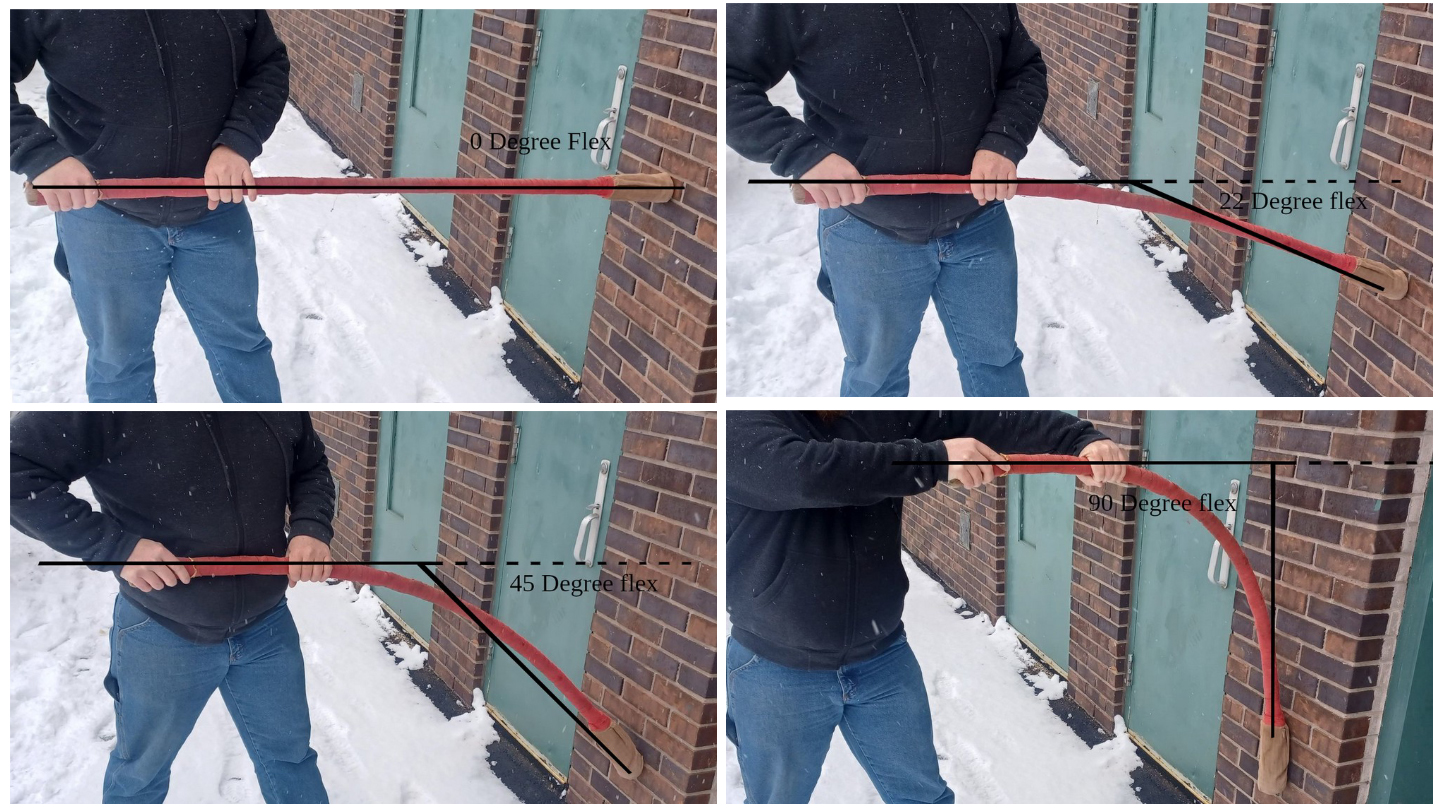
This refers to how much a melee weapon can bend safely during normal use. Flex is measured by holding the weapon low on the handle for maximum length and striking a shield or padded surface. A second person can then estimate the flex.
- The maximum allowed flex for any weapon is 45 degrees.
Handle / Unpadded Segment
Refers to any completely unpadded part of a weapon.
- Unpadded segments cannot total more than 50% of the weapon.
- Surfaces that are likely to come into contact with other players during regular use cannot be left unpadded.
Incidental Padding
Incidental Padding, also known as 'Courtesy Padding', is a padded non-striking surface intended to limit injuries from incidental contact with parts that are not strike-legal.
- Must have at least 0.5" of safety-grade foam and provide enough cushioning to prevent any core from being felt during a typical strike, but it does not need to be as comfortable as strike-legal padding.
- Any portions of Incidental Padding that lies within 0.5" of a striking surface must be covered in the same manner as the adjacent strike-legal surface.
- Incidental Padding that is not within 0.5" of a striking surface may have a non-abrasive rubber coating (or non-vinyl equivalent) applied so long as it does not compromise the purpose of the padding by making it too firm.
Multi-Ended Weapons
Any melee weapon may have multiple segments and striking tips.
- Each segment that is intended to slash and stab must be Strike-Legal for at least 1/3 of the weapon's total length or 18", whichever is less, starting from the striking tip and moving continuously inwards. If the segment merges before the required amount is reached, the merged section that continues toward the handle counts for this total.
- Madu segments intended to stab and slash only require Strike-Legal padding for 1/3 of the weapon's total length or 12", whichever is less.
- Segments intended to be Stab-Only only require 6" of Strike-Legal padding.
- Segments must not be arranged in such a way that could create a high risk of a non-striking surface contacting a player when the weapon is used to strike normally. Any non-striking segments that are out of the way but could still reasonably come into contact with another player, such as crossguards, must be covered with Incidental Padding.
- If a weapon has both regular and stab-only segments, they must not be arranged in such a way that could risk a player being struck with the side of a stab-only segment when the weapon is used to slash.
- Multi-ended weapons must meet all other requirements for its weapon type.
Non-Striking Tip
This refers to the end of a non-striking weapon segment, such as a pommel or the end of crossguard. Weapon Segments with any amount of Strike-Legal padding cannot have a Non-Striking Tip.
- Must be securely capped with Incidental Padding.
- No part may protrude more than 1.5" through a 2" ring when uncompressed.
Ownership Label
All projectiles must be clearly labelled with their owner’s name. It does not need to be large or visible during combat but should be easy to find and reference when necessary, such as when a Reeve is trying to return a projectile that flew into a bush, or in the instance where that projectile causes injury to another player.
- Projectiles without ownership labels may not be used in combat.
- Weapons designed explicitly to be shared, such as park loaner weapons, should be labelled with the park’s name.
Padding and Foam
All Amtgard weapons and shields require some amount of padding to prevent player injuries. In this context, padding refers to either Strike-Legal Padding or Incidental Padding. The type required will determine which materials are acceptable to use for this purpose. If a piece of equipment simply requires "padding", "foam" or "cushioning" with no other description, then you can meet that padding requirement with either Strike-Legal or Incidental Padding.
Foam Grades
Foams can vary widely in terms of how they will act when used as padding so it is important to choose one that helps ensure your equipment will meet the universal equipment requirements - notably safety and durability. When in doubt, take the time to learn from an experienced player or study an online construction tutorial.
This rulebook may refer to two amtgard-defined categories of foam: Safety-grade and Comfort-grade.
Safety-Grade Foam
Safety-Grade Foams are sturdy and provide firm resistance to compression when tested with the pads of fingers, but are not rigid. The goal of Safety-Grade Foams is to provide the primary padding for weapons. Safety-Grade Foams should, when used in the specified thicknesses, prevent injuries and limit discomfort experienced by other players when they are struck with weapons during combat.
- Typical foams in this category include "blue camp pad", "pool noodle", and microcell foam.
Note: Safety-Grade foams sometimes come in multiple densities or stiffnesses and not all of them are safe for use on their own. Higher stiffness or density Safety-Grade Foams may not be suitable for use as the sole padding on a weapon but may improve the durability and striking comfort of a weapon when used as a base layer of foam closest to the core, with less stiff or dense Safety-Grade foam on top. Padding a weapon using multiple Safety-Grade Foams with different properties is referred to as building with "progressive resistance" or "progressive density".
Comfort-Grade Foam
Comfort-Grade Foams are squishy and less firm than Safety-Grade Foams while still being dense enough to provide some resistance to typical Amtgard weapon impacts. The goal of Comfort-Grade Foams is to provide greater shock absorption and further reduce discomfort from weapon impacts which may not be sufficiently mitigated by Safety-Grade Foams alone.
- Typical uses for Comfort-Grade Foams include additional padding on stabbing tips, arrows, and javelins.
- Comfort-Grade Foams should not be used on their own to pad a core.
- Typical foams in this category include "marine foam" and "high-density charcoal foam".
Extra Notes
- Very dense or rigid foam can be used as part of a structural core but it will not count towards any mandatory padding requirements. Polystyrene (hard TV packaging) is an example of a foam that is too rigid.
- Very soft and light foam can be used to add shape or extra comfort but will not count towards any mandatory padding requirements.
Stab-Only
Any segment of a weapon may be built to be Stab-Only.
- As the name implies, weapon segments built to be Stab-only can only be used to stab.
- A Stab-Only segment requires 6" of Strike-Legal Padding. This padding must begin at the Striking Tip and extend down the length of the weapon on all sides of the core (A stab-only segment must be Omni.)
- This padding cannot be reduced by Heavy Padding or Super Heavy Padding.
- A weapon that is composed entirely of Stab-Only segments can replace all other Strike-Legal Padding required by its type with Incidental Padding.
- A weapon with both regular and stab-only segments must still meet the full padding requirements for its type.
- If a weapon has both regular and stab-only segments, they must not be arranged in such a way that could risk a player being struck with the side of a stab-only segment when the weapon is used to slash.
Strike-Legal Padding
Strike-Legal Padding is padding that is used to create striking surfaces that are safe to strike another player with.
- Weapons that require Strike-Legal Padding must be sufficiently padded to prevent injury if used to strike an opponent with the most force that could reasonably be expected in Amtgard combat. Combat contact with the strike-legal portions of a weapon must not be unreasonably painful, nor should it leave bruises or have the potential to break bones and teeth when used by an average player as well as its intended user.
- Regardless of the requirements listed below, Hit Testing will always be required to assess the more subjective aspects of Strike-Legal padding, such as impact force and player comfort.
- Since combat is chaotic and every participant has different pain tolerances and sensitive areas, occasional instances of uncomfortable contact should be expected, however repeated or egregious offenses from the same weapon should result in the weapon and/or the user being removed from play.
- No part of the weapon’s striking surface, whether the tip, the edge, the face or any other part, may protrude more than 1.5" through a two-and-a-half inch (2.5") ring when uncompressed.
- All Strike-Legal surfaces must have an opaque cover and be visually distinct from Non-Striking Surfaces on the same weapon.
Melee Strike Legal
In addition to the above, Strike-Legal padding on melee weapons must follow these additional rules:
- Strike-Legal Padding must begin at each Striking Tip and move inward along the core toward the handle. It must be continuous for the entire required length. Any forked segments that split from a Strike-Legal point must also be entirely Strike-Legal.
- Must have at least 1" of safety-grade foam over the weapon core.
- Must have a continuous cross-section of at least 2.5" from edge to edge.
- The entire circumference of the core does not need to be strike-legal, however any part of this circumference that is not strike-legal must be covered with Incidental Padding and cannot be used to strike.
- Striking Tips must be sufficiently capped to resist stab impact and prevent the core from pushing through. The foam should not deflect or fold over excessively when stabbing and always return to its original position.
- It is strongly recommended that weapons intended to regularly strike with a thrusting motion also include comfort-grade foam on the tip to further cushion the blow. Weapons designed for two-handed stabs, such as large pikes, may need even more padding than smaller, single-handed weapons. Hit Testing will help determine what is the ideal amount of extra padding for player safety and comfort.
Heavy Padding
A segment of a melee weapon is considered to have Heavy Padding if it meets the requirements for Strike-Legal padding and also has an edge-to-edge, cross-section of 4" or greater (instead of 2.5"). This extra padding must begin within 3" of the Striking Tip and proceed continuously towards the handle.
- Heavy Padding can apply to flat-blade weapons. The 4" cross-section does not need to be around the entire core.
Heavy Padding Substitution
For each inch of Heavy Padding added along the core, you may replace one (1) inch of required Strike-Legal Padding with Incidental Padding.
- Incidental Padding added in this manner must begin by replacing the padding closest to the handle and then proceed continuously towards the Striking Tip.
- A weapon cannot substitute more than 50% of its required Strike-Legal padding this way.
Super Heavy Padding
Super Heavy Padding follows the same rules as Heavy Padding except it requires a cross-section of 8" or greater. If both Heavy and Super Heavy padding are used together, the Super Heavy Padding must be closest to the tip.
Super Heavy Padding Substitution
This follows the same rules as Heavy Padding Substitution except for each inch of Super Heavy Padding added along the core, you may replace two (2) inches of required Strike-Legal Padding with Incidental Padding.
Striking Tip
The tip of any weapon segment that will be used to strike other players. All Striking Tips must have Strike-Legal padding.
- Must not protrude more than 1.5" through a two-and-a-half inch (2.5") ring when uncompressed.
- Must not end in an angle less than 90 degrees.
Total Length
The measurement used to determine weapon type.
- Straight weapons are measured in a straight line parallel to the core, from the furthest edge on one end to the furthest edge on the other end.
- All other weapons are measured by the largest straight distance between any two ends or edges.
Weapon Segments
A weapon segment is a portion of a melee weapon. Segments begin at the handle (or the shield, for Madus) and end at a striking or non-striking tip.
- Striking segments are segments that end with a Striking Tip.
- Non-Striking segments are segments that ends with a Non-Striking Tip.
- Segments may also branch or split to create new segments (like a trident or crossguard). These branching segments must meet or exceed the padding requirements of the point they branched out from. For example, if a segment branches out from a point that requires Strike-Legal padding then the entirety of that branched segment must also be Strike-Legal.
Identifying weapons segments is most relevant when dealing with Madus, Multi-Ended Weapons, and Stab-Only weapons.
Melee Weapons
General Rules
Melee weapons represent swords, axes, spears, flails, pole-arms and anything else that can be used to directly slash or stab an opponent in close combat.
- All melee weapons require a rigid core.
- Approved melee weapons may be used to strike with their Strike-Legal surfaces and block or parry with any portion of the weapon.
- Melee weapons can never be launched or thrown as a form of attack. Javelins are the only exception to this rule due to their ability to act as both as melee weapon and a projectile.
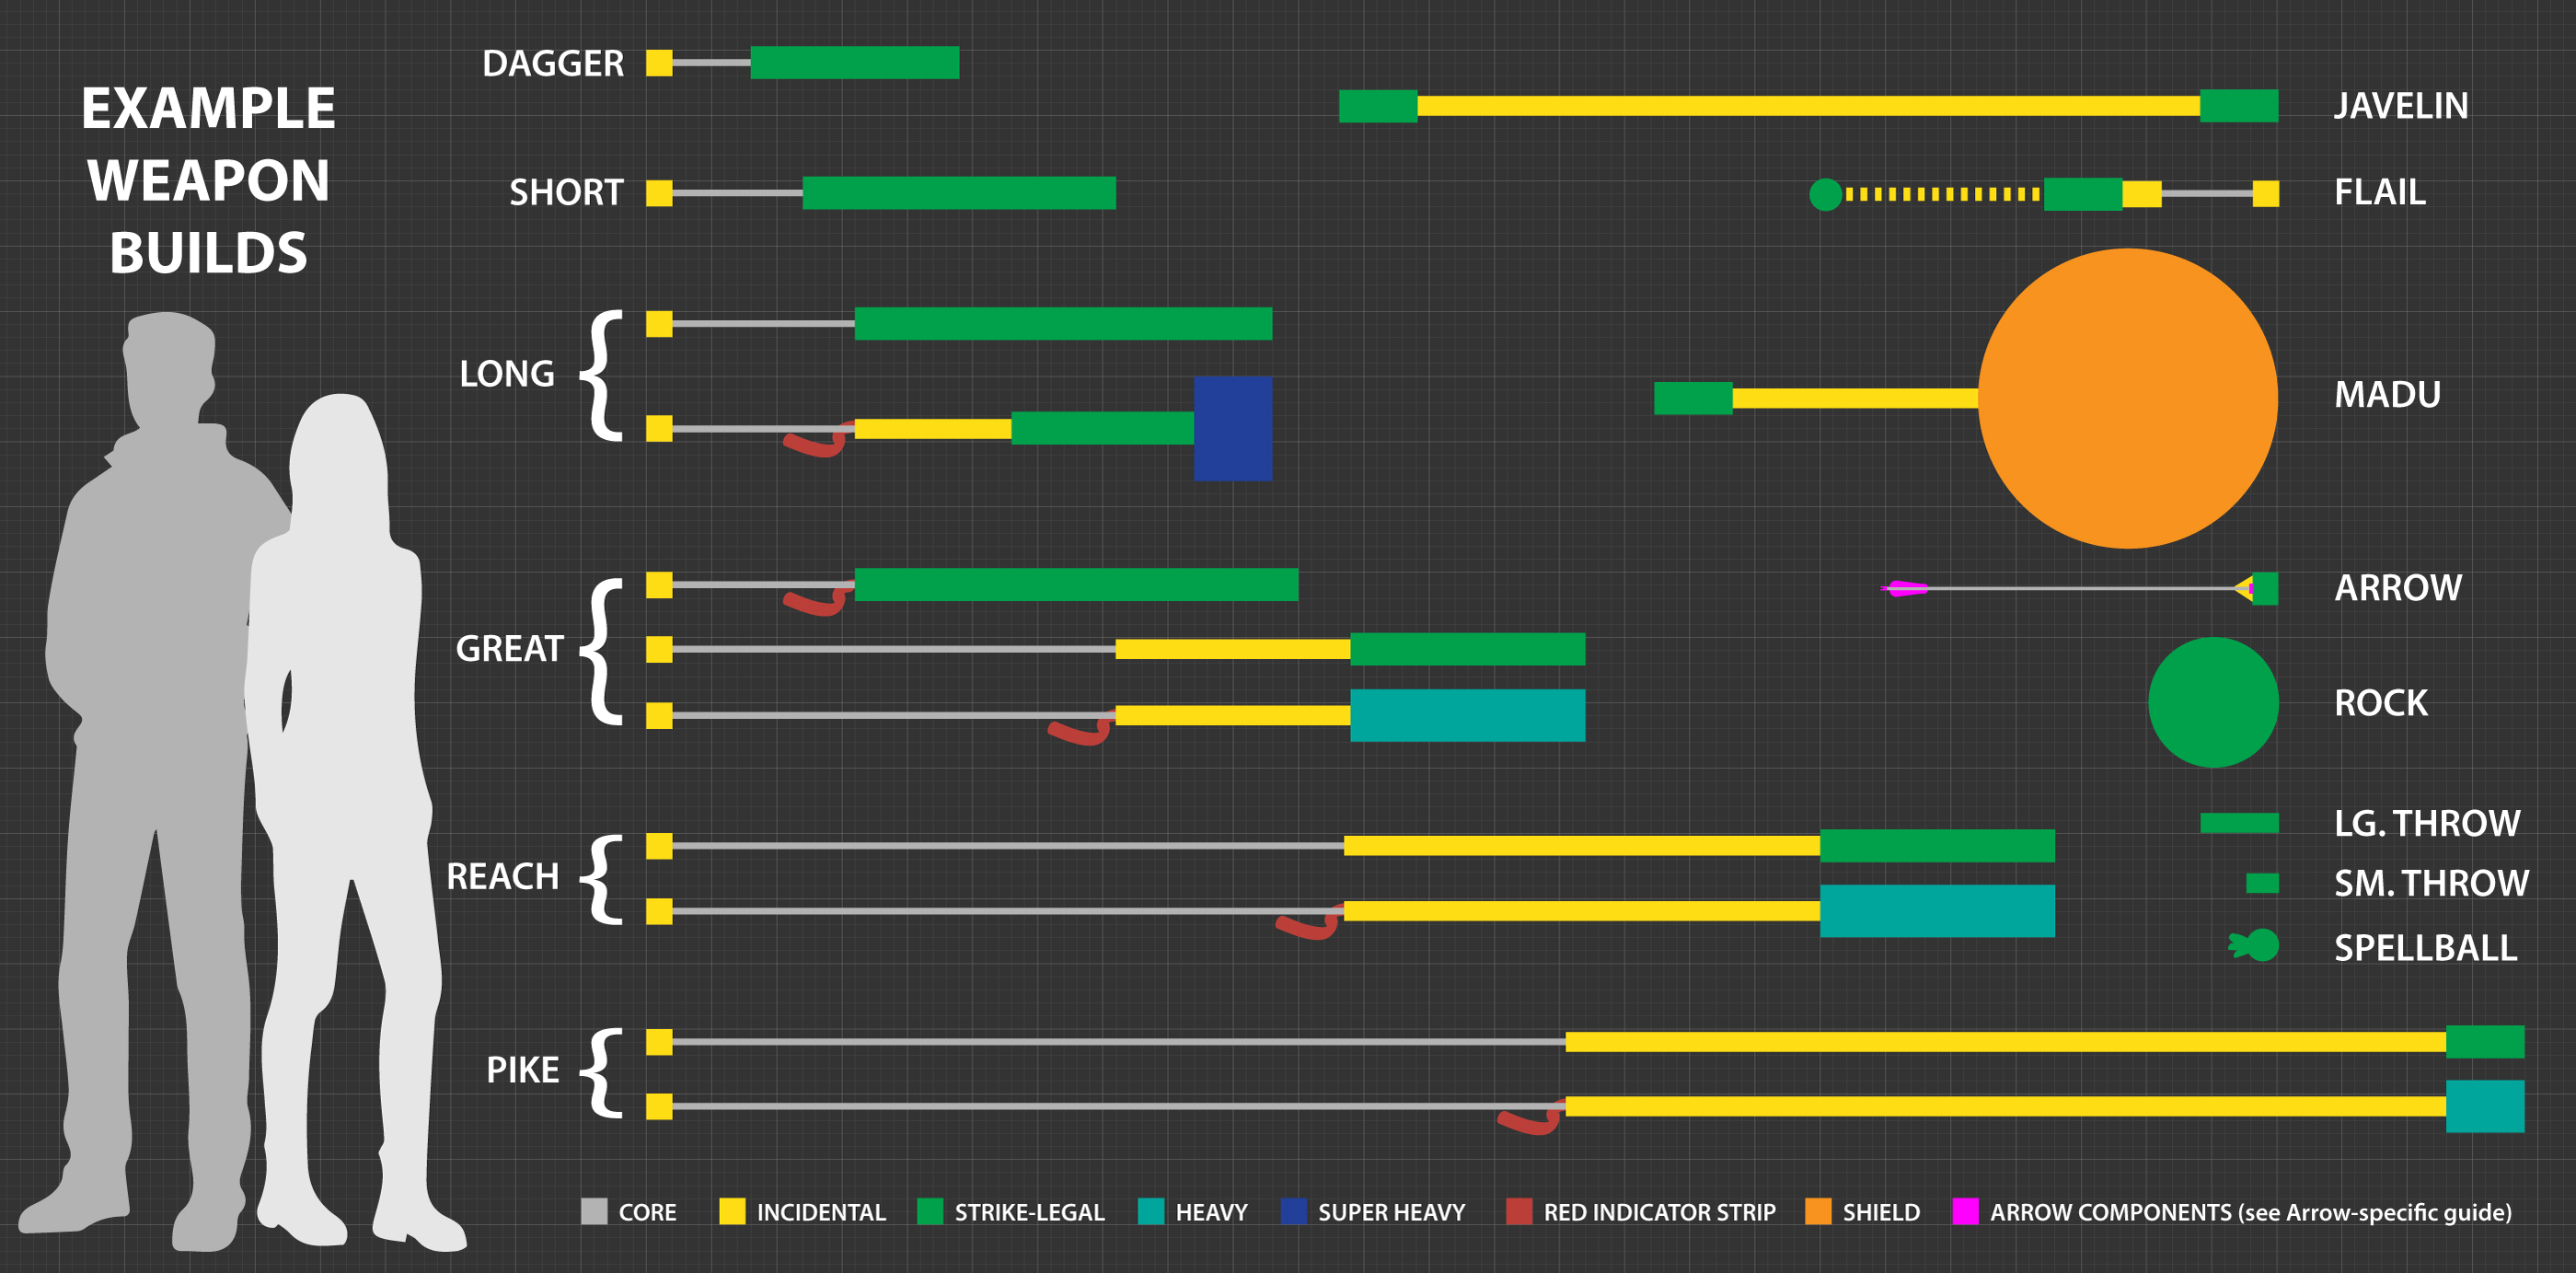
Dagger
- Must meet the Universal Equipment Requirements.
- Total length must be at least 12" (1ft), up to 24" (2ft).
- At least 2/3 of the weapon must be Strike-Legal.
Short
- Must meet the Universal Equipment Requirements.
- Total length must be greater than 24" (2ft), up to 36" (3ft).
- At least 2/3 of the weapon must be Strike-Legal.
Long
- Must meet the Universal Equipment Requirements.
- Total length must be greater than 36" (3ft), up to 48" (4ft).
- At least 2/3 of the weapon must be Strike-Legal.
Two-Hand Armor-Breaking Variant
- Any weapon segment that has at least 6" of Super Heavy Padding gains Armor Breaking when the weapon is wielded with two hands.
Great
- Must meet the Universal Equipment Requirements.
- Total length must be greater than 48" (4ft), up to 72" (6ft).
- Must be 50% padded and have at least 18" Strike-Legal.
Two-Hand Shield-Crushing Armor-Breaking (SCAB) Variant
- Any weapon segment that is Strike-Legal for at least 2/3 of the weapon's full length; or has at least 18" of Heavy Padding gains Armor Breaking and Shield Crushing when the weapon is wielded with two hands.
- Stab-Only segments require just 6" of Heavy Padding to gain this benefit. (Reminder: You cannot Shield Crush with a stab.)
Reach
- Must meet the Universal Equipment Requirements.
- Total length must be greater than 72" (6ft), up to 108" (9ft).
- Must be 50% padded and have at least 18" Strike-Legal.
Two-Hand Armor-Breaking Variant
- Any weapon segment that has at least 18" of Heavy Padding gains Armor Breaking when the weapon is wielded with two hands.
- Stab-Only segments require just 6" of Heavy Padding to gain this benefit.
Pike
- Must meet the Universal Equipment Requirements.
- Pikes are Stab-Only. They cannot be used to slash.
- Total length must be greater than 108" (9ft), up to 144" (12ft).
- Must be 50% padded and have at least 6" Strike-Legal as per Stab-Only.
Two-Hand Armor-Breaking Variant
- Any weapon segment that has at least 6" of Heavy Padding gains Armor Breaking when the weapon is wielded with two hands.
Flail
- Must meet the Universal Equipment Requirements.
- Is composed of a handle with a single chain and articulating head. It cannot be multi-ended.
- The total length of all three components cannot exceed 36" when gently pulled taut.
Flail Head
- Must be equal or larger than a 2.5" sphere.
- Must be entirely Strike-Legal.
- Cannot contain a rigid core.
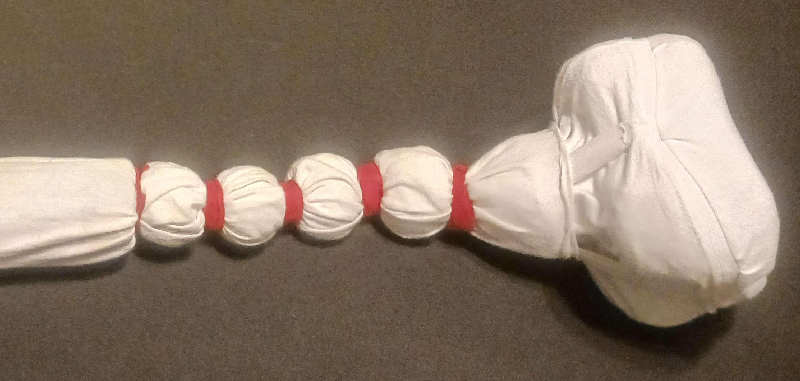
- The combined chain-and-head portion may not exceed 18" in length when gently pulled taut.
- Must be constructed using soft, durable, non-abrasive materials, such as a cotton rope. Actual chains are prohibited. A rope-like core is not required as long as this section behaves like a chain and is not at risk of tearing apart under the stress of the flailing motion.
- If the chain portion is longer than 0.5", it must include small foam rings (or equivalent design) spaced no further than 0.5" apart along the entire length.
Flail Handle
- Must be at least 12".
- 50% of the flail handle must be padded.
- The top 1/3 closest to the chain must also be Strike-Legal.
- This padding must begin at point where the chain connects to the handle and extend down the length of the weapon on all sides of the core (i.e. it must be Omni).
- The amount of Strike Legal required cannot be reduced by Heavy Padding or Super Heavy Padding.
Flail Combat Rules
Only the head of a flail can inflict valid strikes, even though the handle segment also has strike-legal padding. This extra padding is intended to allow a player to strike the handle safely against other equipment so the flail can wrap around without damaging the struck equipment.
Madu
- Must meet the Universal Equipment Requirements.
- Total length must be between 18" up to 108" (9ft).
- Is a hybrid Melee Weapon and Shield.
- Any shield with weapons permanently affixed to it will be considered a Madu and must conform to these rules.
- Any weapon segments must be easily recognizable as weapons, and the shield portion must be easily recognizable as a shield.
- The division between weapon and shield segments must be visually distinct.
Madu Shield Portion
The shield portion must be a legal shield.
Madu Weapon Segments
Madu weapon segments are measured from the point where they extend beyond the shield.
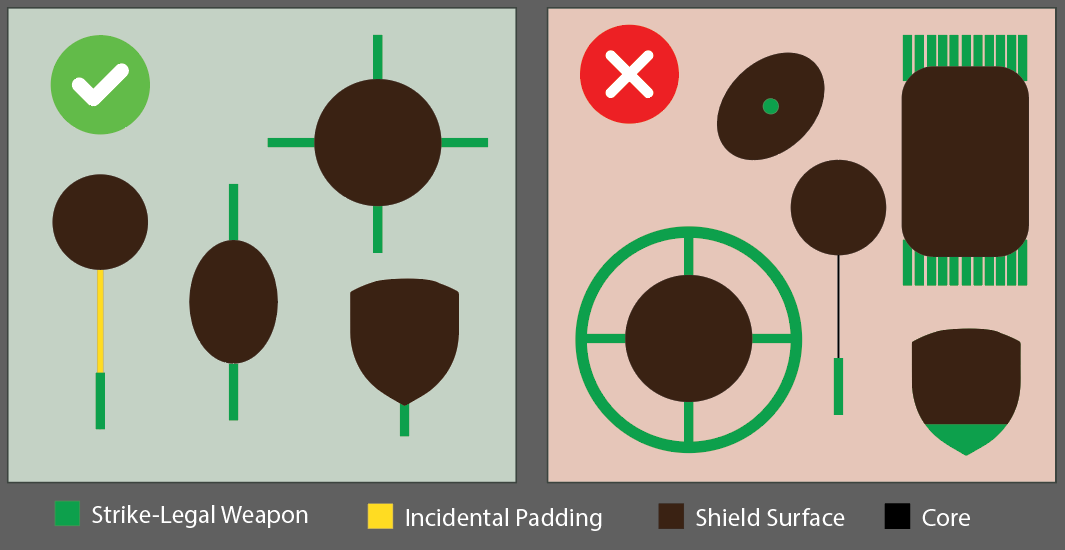
- Must not extend outward from the face of the shield.
- Must not articulate or have a chain like a Flail.
- Must not mimic or offer similar protective coverage to that of a shield. If this is a case, the offending segments will count as part of the shield, not a weapon, and be forced to adhere to shield construction rules.
- Segments intended to be Stab-Only must be at least 6" long.
- Segments intended to both slash and stab must be at least 12" long.
- Segments that measure 18" or less must be entirely Strike-Legal.
- Segments that measure greater than 18" must have at least 18" of Strike-Legal Padding and have Incidental Padding for the remainder.
- Padding Substitution can only be used on segments greater than 18" and cannot reduce the amount of Strike-Legal to less than 18".
Two-Hand 'Great' Madu Variant
If the total length of the Madu is 72" (6ft) or less, the following variation can be used:
- Any weapon segment that is greater than 48" (4ft) and is at least 2/3 Strike-Legal or has at least 18" of Heavy Padding gains Armor Breaking and Shield Crushing when the weapon is wielded with two hands.
- Stab-Only segments require just 6" of Heavy Padding to gain this benefit.
Two-Hand 'Reach' Madu Variant
- Any weapon segment that is greater than 72" (6ft) and has at least 18" of Heavy Padding gains Armor Breaking when the weapon is wielded with two hands.
- Stab-Only segments require just 6" of Heavy Padding to gain this benefit.
Madu-Specific Combat Rules
- Madus do not have access to the variant options or gameplay rules of other weapon or shield categories, even if parts of the Madu are constructed to mimic those weapons or shields.
- Example 1: A Madu constructed with a small-size shield will still take up a free hand and cannot be strapped to the arm without a handle.
- Example 2: A super-heavy padded Madu that is between 36" and 48" will not gain Armor Breaking when wielded 2-handed because that variant is only available to Long weapons.
- A Madu can only be wielded if the player can wield both a non-staff weapon of the Madu’s total length (weapon portions + shield portions) and a shield equal to or greater than the Madu’s shield's size.
- The weapon segments can be struck and affected by weapon-specific effects such as Weapon Destroying, and the Shield portion can be struck and affected by shield-specific effects such as Shield Crushing and Shield Destroying. Once affected this way, the entire Madu is affected, for better or worse. If the weapon or shield portion is destroyed, the entire Madu is destroyed. If one part of the Madu is restored, the entire Madu is restored.
Javelin
- Is a hybrid Stab-Only Melee Weapon and Stabbing Projectile.
- Must meet the Universal Equipment Requirements.
- Total length must be between 36" (3ft), up to 72" (6ft).
- Must have a straight core with at most one Striking Tip per end.
- Each striking tip must have at least 6" Strike-Legal as per Stab-Only.
- All other Non-Striking Surfaces must be covered with Incidental Padding.
- Must have an ownership label as per projectiles.
Javelin Hybrid Combat Rules
- By default, a Javelin is a Stab-Only Melee Weapon. It cannot be used to slash.
- When thrown, it becomes a Stabbing Projectile and does not count as a melee weapon again until it becomes Unattended or Carried.
- Javelins become Armor Breaking and Shield Crushing once they have travelled their length through the air.
- Destroyed Javelins cannot be thrown.
Magic Staff
- Is a non-striking Melee Weapon (see combat rules below).
- Must meet the Universal Equipment Requirements.
- Total length must be at least 48" (4ft), up to 72" (6ft).
- Must have a straight core with exactly two non-striking ends.
- All core must be covered with Incidental Padding.
Magic Staff Combat Rules
- Cannot be used to strike. It can only block.
- Is a weapon. Can be destroyed like any other weapon.
- Does not take up a Free Hand when casting abilities.
- Players can only wield a single magic staff at a time.
Projectile Weapons
General Rules
Projectile Weapons represent anything that is launched or thrown to inflict damage or effects, such as arrows, kunai, chakrams, and tomahawks as well as magical blasts like fireballs and lightning. The following general rules apply to all forms of projectile weapons:
- May not be used to strike in melee.
- May not be used to parry or block.
- Cannot become destroyed by any means.
- May be carried in any number unless otherwise restricted, such as by class customization.
- All projectiles except Arrows and Bolts must be thrown by hand, one at a time, per hand.
- A player may hold a throwing weapon in each hand and throw both of them simultaneously, but cannot throw them together from the same hand.
- Arrows and Bolts must be fired from a bow or crossbow as appropriate.
- Each projectile can affect multiple targets in a single flight as long as each contact meets the criteria for a valid strike. Projectiles become harmless after their movement is completely halted.
- Batting, kicking, or otherwise applying significant force to a projectile in motion is prohibited.
- Arrows in flight must be blocked passively by placing an object in their flight path.
- Other non-arrow projectiles may be blocked, parried, or lightly struck out of the air.
- Players may not catch or grab projectile weapons in flight.
- Projectiles may be shared among players that are given explicit permission from the owner of said projectiles.
- The owner may retract their permission at any time for any reason.
- The owner is responsible for ensuring the safe use of their projectiles when shared with or used by another player.
- Players using shared projectiles should be respectful and treat the borrowed equipment with care.
- When sharing Spellballs, Specialty Arrows, or any other similarly restricted projectile, players must still adhere to the associated frequency rules and carrying limits.
- Players using shared projectiles must not hoard them or otherwise try to gain a gameplay advantage by deliberately obstructing the amount of projectiles that other sharing player(s) have access to. This is especially relevant when sharing Spellballs and Specialty Arrows.
- There are two sub-types of projectile weapon: Contact Projectiles and Stabbing Projectiles.
- Contact Projectiles can strike with any part of their surface.
- Stabbing Projectiles can only strike with their tip.
Contact Projectiles
Small Thrown
- Must meet the Universal Equipment Requirements.
- Must have a non-rigid core.
- Must be between 2.5" and 6" in total length.
- Must be entirely Strike-Legal. There is no minimum thickness, however extremely thin projectiles may struggle to make valid contact so craft accordingly.
- Must not be constructed in a way that could be reasonably confused with a Spellball.
Large Thrown
- Must meet the Universal Equipment Requirements.
- Must have a non-rigid core.
- Must be greater than 6", up to 18" in total length.
- Must be entirely Strike-Legal. There is no minimum thickness, however extremely thin projectiles may struggle to make valid contact so craft accordingly.
- Must not be constructed in a way that could be reasonably confused with a Spellball or Rock.
Spellball
- Must meet the Universal Equipment Requirements.
- Must have a non-rigid core.
- Must be spherical, between 2.5" and 6" in diameter.
- Must be entirely Strike-Legal.
- Must have a visible tail or streamer between 1" and 6" in length.
- Every Spellball is associated with an ability and must be covered with the appropriate Color Code.
Ability-Linked
- Players can only use a Spellball projectile if they have a Spellball ability that allows it.
Rocks
- Must meet the Universal Equipment Requirements.
- Must have a non-rigid core.
- Must be equal or larger than a 10" diameter sphere.
- Must be entirely Strike-Legal.
Rock Gameplay Rules
- Rocks are Shield Crushing, Armor Breaking, and Weapon Destroying.
Stabbing Projectiles
Javelins
See Javelins under Melee Weapons.
Bows & Crossbows
Bows and Crossbows are used to fire arrows or bolts respectively. Only actual bows and crossbows may be used for this purpose. Other forms of projectile launchers cannot be used to represent a bow or crossbow.
- Compound bows are prohibited.
- Regular Bows must have a draw weight of 35lbs or less at a 28" draw.
- Crossbows are limited to no more than 450 inch-pounds.
Bow & Crossbow Gameplay Rules
- Bows and Crossbows cannot be destroyed.
- The physical bow or crossbow cannot be used to strike another player. They must be exclusively used to launch Arrows & Bolts.
- Cannot be intentionally struck nor used to block, deflect or otherwise defend against incoming strikes. A certain amount of incidental contact during the chaos of live combat should be expected, however repeated or egregious disregard for this rule can result in suspension from play or loss of archery privileges.
- If accidentally struck, it is treated as an Invalid Obstruction.
- Bows and Crossbows cannot be wielded with any other equipment in the same hand (besides arrows). Likewise, other equipment cannot be wielded while in the same hand as a bow or crossbow. A buckler or small shield may still be wielded on the arm so long as there is no risk of it interfering with the safe use of the bow.
- For gameplay purposes, reloading a crossbow does not count as wielding it.
- Bows may not be drawn beyond 28" at any time and must be half-drawn at ranges closer than 20ft. Crossbows are not required to half draw.
Arrows & Bolts
All forms of arrows and bolts follow the same rules.
- Must meet the Universal Equipment Requirements.
- Must be built to be fired from a bow or crossbow, as appropriate.
- Must be safe to strike other players with the tip (see construction guide below).
Developer Note: For accessibility purposes, playtesters may continue to use Amtgard V8-Legal arrows during V9 playtest games until such a time that we can guarantee the investment in reconstruction will not be wasted effort. That said, we are deeply thankful and appreciative of everyone who chooses to invest their time and resources to build and playtest the construction rules below.
Arrow Gameplay Rules
- All Arrows and Bolts are Armor Breaking and Weapon Destroying.
- Specialty Arrows (or Bolts) will impart additional effects based on their Color-Code.
- Players can only use a Specialty Arrow if they have an ability that allows it.
- Players may fire multiple regular arrows at once however Specialty Arrows must be fired alone.
- Multiple arrows fired simultaneously will count as separate strikes, even if they hit the same Hit Location.
Arrow Construction Guide
Before building your first arrows or bolts, take the time to learn from an experienced player or study an online construction tutorial. Poorly constructed, poorly repaired, or outright broken arrows/bolts can pose a serious safety hazard and may never be used for Amtgard combat.
Arrow Shaft Construction Rules
The shaft of the arrow or bolt is the stick portion to which the head is affixed.
- Must be carbon, aluminum, or fiberglass.
- Any real arrowheads or hunting tips must be removed.
- Shafts longer than 28" must have a drawstop around the shaft to physically prevent drawing the arrow past 28".
- The nock and any vanes/fletching present must be in good repair.
- The orientation of vanes/fletchings (or the lack thereof) must not cause chaotic or unpredictable flight.
Arrow Blunt Construction Rules
The blunt is the reinforced tip of the shaft upon which the striking portion, the arrow head, will be constructed.
- All blunts must be solidly built, stiff enough to carry anticipated loads without excessive deformation, and able to support typical Amtgard archery impacts repeatedly without failure or degradation.
- The end of the shaft must be securely capped with a circular, impact-resistant disc at least 1" in diameter.
- The disc must be centered over the end of the shaft.
- If a metal disc is used, it must be at least 1/16" steel or equivalent.
- Discs of any other material must be durable, impact-resistant, and at least 1/4" thick.
- The blunt must then be further built up to at least 1.5" in diameter.
- The non-disc portion of the blunt can be constructed from any material, including foam, so long as it ensures that the foam arrowhead built upon it is not able to move easily in relation to the shaft. This includes but is not limited to: plunging up and down, wobbling from side to side, twisting-without-return, etc.
- The entire blunt can be a single unit (such as a 3D-printed piece) as long as the resulting structure is equivalent or safer than the above requirements.
Arrow Head Construction Rules
The arrow head is the Strike-Legal portion at the end of an arrow or bolt, after the blunt.
- Must be Strike-Legal on all sides with a foam depth of at least 2" in front of the blunt.
- Must have a circular cross-section of 2" or greater throughout the entire head.
- Must have at least 0.5" of impact-resistant safety-grade foam immediately after the blunt. This foam must not deform around the arrow shaft or blunt on impact.
- The physical striking surface of the arrowhead must include at least 1" comfort-grade foam with a circular diameter of 2.5".
- Domed arrowheads are allowed but must be no sharper than a 2.75" hemisphere. The narrow tip of the dome does not need to meet the 2.5" cross-section as long as the head meets the 2" depth rule (see diagram).
- Any additional foam used to meet the 2" depth requirement should be chosen with the goal of making the arrow as safe and comfortable to be struck by as possible, specifically in regards to accidental strikes to the face and eyes. When in doubt, use safety-grade foam.
Arrow Head Cover
- Arrow heads must be covered in a durable, opaque cloth. Cloth tape may not be used.
- Specialty Arrows must be covered with the appropriate Color Code.
- Properly colored fabric strips may affixed to the shaft in lieu of colored head covers. These strips must be clearly visible from at least 20ft away and not impact the safe use of the arrow.
- Covers for regular arrows must be a color or combination of colors that cannot be reasonably mistaken for a specialty arrow.
Eye damage from accidental face strikes is the most common form on arrow-based injury in LARP. A safe arrow design must not damage the orbital bones or be able to put pressure directly on the eyeball. As a rule of thumb, arrows should be built to the point that their owners are willing to receive a straight shot to the face under test conditions without fear of serious injury.
Siege Weapons
Siege Weapons are extremely powerful tools of destruction. Examples of this type of weapon include historical siege engines like ballistas, catapults, and trebuchets as well as the teeth, claws, and clubs of massive monsters like dragons and titans.
- Siege weapons are designed to be incredibly strong and can quickly break a game if their inclusion is not planned and executed ahead of time. As such, they are reserved exclusively for use by Game Organizers during special occasions and planned scenarios.
- The physical representation of a Siege weapon along with its method of use and distribution is determined by the Game Organizer on a case-by-case basis for the activity where it is being used. Regardless of implementation method, it must still meet the Universal Equipment Requirements.
- The actual Strike-Legal part of a Siege Weapon’s attack must always be represented by a normal Amtgard melee or projectile weapon, as appropriate, such as a catapult launching rocks or a Dragon using daggers as claws.
- Strikes from Siege Weapons will inflict the 'Siege' hits instead of their normal combat effects unless instructed otherwise by the Game Organizer.
Developer Note: See the Game Organizer Guide for more details and guidance about running an activity that includes Siege Weapons.
Shields
General Rules
- Shields are used to block strikes from weapons.
- They can only be affected by strikes and effects that specifically affect shields, such as Shield Crushing and Shield Destroying.
- Players may only ever wield a single shield at a time, however they can wield a shield simultaneously in the same hand as any another piece of equipment except for a Bow or Crossbow.
- Shields with straps are only wielded when worn on a single arm or held in hand. They cannot be wielded while worn like a backpack or strapped to other parts of the body such as the torso, legs, hip, or head.
- If a player cannot easily remove or discard their shield when necessary, such as due to it being strapped to their arm, then they must do their best to keep it out of combat and must not derive an gameplay advantage from it. A shield strapped to a wounded arm counts as an Invalid Obstruction.
V8 Transition Note:The V8 ‘Shield Drop Trick’ does not exist in V9. A shield in mid-air is an invalid obstruction and cannot be used to block attacks.
Construction Rules
- Shields must meet the Universal Equipment Requirements.
- A shield’s size is determined by the surface area of its largest silhouette, measured on a flat plane. It's height and width, when necessary, are based on the same silhouette.
- May be constructed in any style or shape but cannot be made in such a way as to mimic the function of physical armor (such as shields that excessively wrap around a limb or shields that are precisely shaped to a body part).
- Must have a sturdy structural core that will not break or bend significantly during the course of combat.
- Some acceptable materials are: plywood, high-impact plastics, aluminum, and sturdy, high-density, closed-cell foam.
- Easily breakable or low-density foams are inappropriate for use as the structural core.
- The rim and face of the shield must be padded with at least 1" of safety-grade foam.
- Padding should wrap around the rigid edges of the core.
- Shields made entirely of foam do not require additional padding but must be composed of closed-cell foam that is at least 1" thick.
- No part of a shield may protrude more than 1.5" through a two-inch (2") ring when uncompressed.
- All rigid or sharp-edged hardware must be rounded off or padded in such a way that there are no burs or snags which could damage objects or players.
- Hard edges may not be exposed on any surface which can reasonably come into contact with another player or their equipment.
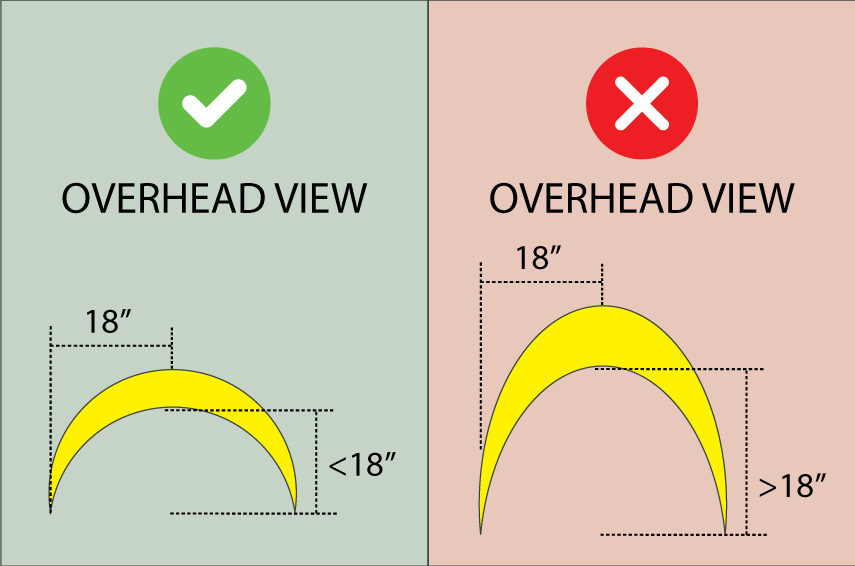
- Curved/Domed shields (and similarly recessed shapes) may not curve or recess inwards more than half its width, measured on a flat plane.
- The rim and face must have an opaque, durable covering. This may be a non-abrasive rubber coating (or non-vinyl equivalent) so long as it does not compromise the purpose of the padding, such as by making it too firm.
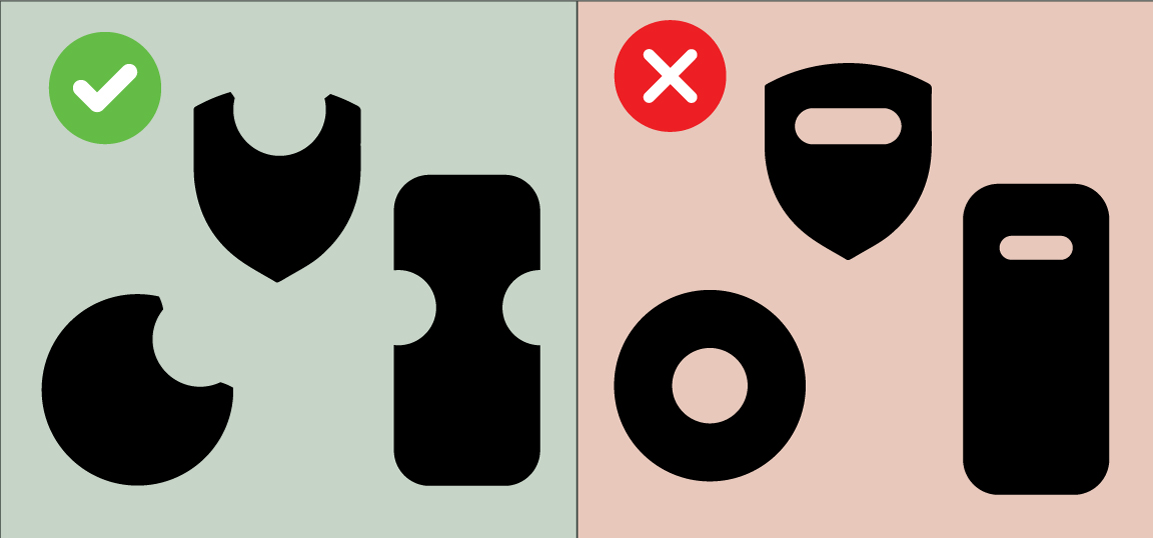
- The face of the shield may not have holes that exist entirely within a silhouette of the shield.
- If the shield has a handle, it must be clearly identifiable as a handle.
- If the shield has straps, they must be sturdy, secure and not at risk of coming loose during combat.
Shields sizes are determined by surface area. Due to the sometimes tedious area math required for certain shield shapes, like a heater or kite shield, these measurements may be difficult to reconfirm during equipment inspection in a timely manner. You can help your equipment inspectors by keeping proof of your math handy in a notebook or cue card in case they need it. Most inspectors will trust you at your word but it is not unfair for them to want to check your math every now and then. Help them help you!.
Bucklers
- Must meet the Universal Equipment Requirements.
- Shield Size must be at least 1/4 square foot (6.8 inch diameter), and no larger than one square foot (13.5 inch diameter).
- Must have either a handle, an arm strap, or both.
- Does not take up a Free Hand when casting abilities.
Strap-Only Variant
Bucklers may be constructed without a handle. If worn on the arm, they can be wielded without holding a handle.
Small Shields
- Must meet the Universal Equipment Requirements.
- Shield Size is no larger than three square feet (23.45 inch diameter).
- Must have either a handle, an arm strap, or both.
- Does not take up a Free Hand when casting abilities.
Strap-Only Variant
Small Shields may be constructed without a handle. If worn on the arm, they can be wielded without holding a handle.
Medium Shields
- Must meet the Universal Equipment Requirements.
- Shield Size is no larger than five square feet (30.28 inch diameter).
- Must have a handle.
Strap Variant
Medium Shields may be constructed with straps. If worn on the arm, they must still be held by their handle to be wielded.
Large Shields
- Must meet the Universal Equipment Requirements.
- Shield Size is no larger than eight square feet (38.3 inch diameter).
- Must have a handle.
Strap Variant
Large Shields may be constructed with straps. If worn on the arm, they must still be held by their handle to be wielded.
Tower Shields
- This is an 🌶️ Experimental size category.
- Must meet the Universal Equipment Requirements.
- Shield Size is no larger than fifteen square feet (52.44 inch diameter).
- Must have a handle.
Strap Variant
Tower Shields may be constructed with straps. If worn on the arm, they must still be held by their handle to be wielded.
Armor
General Rules
Armor grants an advantage in combat by protecting the wearer from physical strikes.
- Armor grants protection in the form of Armor Points.
- When armor in a Hit Location is struck, the victim loses one Armor Point in that location instead of suffering a Wound. If the location struck has no points to lose, the victim will suffer a wound as normal.
- Armor pieces do not track their damage individually. Instead, each Hit Location has an armor point total that is determined by averaging of all armor covering that area.
- Armor only protects what it physically covers. If your elbow is exposed and you are struck in that gap, you will suffer a wound but do not lose any Armor Points.
- Straps and other such material that hold the armor pieces on do not count as part of the armor unless they are specifically built to be as such. (A leather strap across your back holding on your breastplate will not protect you from strikes.)
- Armor Priority: If a strike hits the line between an armored area and an exposed area, the strike will count as only hitting the armor. In other words, if a player wants to strike a gap in your armor, their attack must cleanly hit inside the gap without touching any armor. Armor Priority is superseded by Torso Priority when applicable.
- Armor present on a wounded Hit Location will continue to function and protect against further blows as long as it has armor points to do so.
- There are two types of armor in Amtgard: Natural Armor and Physical Armor.
- A player can only benefit from a single armor type at a time.
- Rules that reference "Armor" in general apply to both types.
- Rules that reference a specific armor type will only affect that type.
Natural Armor
Natural Armor grants an armor rating to the bearer’s skin. A player with natural armor will always have full armor coverage no matter where they are struck. For example: A player with 2 points of Natural Armor will have 2 armor points protecting every inch of every hit location, even while wearing no physical armor pieces.
V8 Transition Note: Natural armor functions exactly like physical armor except that it does not require any actual armor pieces. It cannot have points restored with Heal and it does not have any other special rules that may have been present in previous editions of Amtgard.
Physical Armor
Gameplay Rules
- Physical Armor is represented on a player by actual pieces armor worn by the player.
- Each physical piece is inspected and given an individual Armor Rating which is used to calculate the armor point total for each Hit Location.
- The maximum amount of armor points a Hit Location can ever receive from Physical Armor is six (6). Some Classes will limit this amount further.
- Limits are only applied after armor point totals are fully calculated. Armor Ratings higher than 6 may be used to benefit averaging calculations before the limit is applied.
Example: Ariq is playing a class which has a maximum armor point total of 4pts. He is wearing armor pieces that average to 6 points on his torso, 2 points on his arms, and 1 point on his legs. Since his class has an armor limit of 4 points, Ariq's torso armor is reduced to 4 points for the duration of that game and his arm and leg values remain unchanged. - When worn, armor pieces must be at least partially visible in a way that does not misrepresent the wearer’s potential armor point totals and/or coverage.
- If it is necessary to add or remove pieces of physical armor after a game has started, new armor point totals should be recalculated and adjusted as soon as reasonably possible.
- If armor point values must be adjusted while the player is still alive (possibly with damaged armor), the damage to that location will persist through the equipment change. If the location had suffered 2 damage, the new total will also suffer 2 damage. If the location had zero points remaining, it will always stay at zero even if the new armor pieces increases the maximum point value. If the entire hit location is replaced with new armor that has not been worn during that life, then the current armor value may be restored to maximum value.
Example 1: Delilah is wearing a bracer and gambeson that grants her a total of 4 points on her arm. She suffers 1 damage which reduces her remaining armor points to 3. For whatever reason, she discovers she needs to get rid of the bracer. Her new armor averages to only 2 points so she sets her new maximum to 2 and then applies the 1 damage she has already received, leaving her with 1 point remaining on her arm. Example 2: Robin is wearing a 2pt leather chestpiece on their torso. They suffer damage and are reduced to 0pts remaining. They are then given a 5pt breastplate mid-combat. They remove the leather and put on the breastplate. Since they completely replaced the armor on their torso with new pieces, the don't have to carry over the damage and they can benefit from the full 5pts immediately. If they had some other piece on their torso that didn't get changed out, their maximum would still increase to 5pts but their current value would remain at zero.
Construction Rules
- Must adhere to the Universal Equipment Requirements.
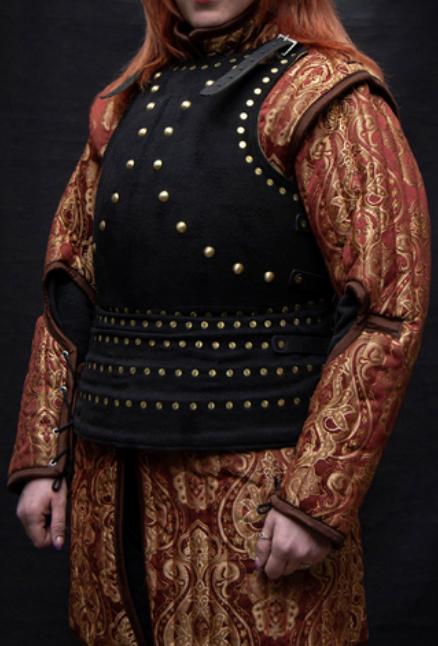
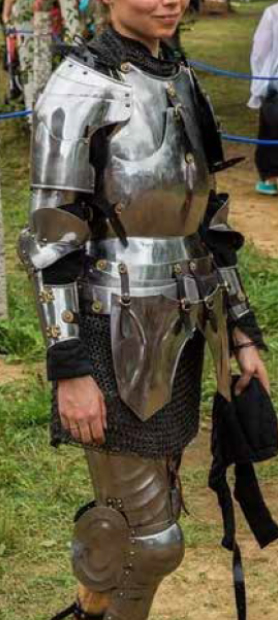
- Must not be easily mistaken as regular garb, nor be obviously synthetic in appearance, even if obscured or otherwise covered.
- Easily damaged materials (such as paper, cardboard, and tinfoil) and obviously modern materials (such as shin pads and chest pads) may never be considered armor on their own. Such materials and items may be used as components of armor but the final product must still meet all other requirements and construction standards in order to receive an Armor Point Rating.
- Armor that does not deform locally when struck must ensure all exposed corners are at least penny round (3/8" radius).
- Loose scales and similar components that move individually as part of piece that deforms locally do not need to be penny round.
- Rigid scales and similar components that are firmly affixed onto a shell must only be rounded if they protrude from the armor.
To Build or to Buy?
Armor construction is a lot more complex than weapon construction. This rulebook simply cannot provide all the information required to teach a novice how to build their own armor. We recommend taking the time to learn from experienced players or studying online tutorials and guides.
Alternatively, you can simply purchase pre-made armor from other players or online vendors. If you wish to take this route, make sure to do your research and ensure it will meet all the requirements necessary for Amtgard armor. Once again, we recommend taking the time to speak with experienced players or studying online discussions.
Rating Armor & Calculating Armor Point Totals
Rating Armor Pieces
Each piece of Physical Armor must be inspected and given an Armor Rating in order to be used for Amtgard combat.
- Physical Armor pieces must be examined and rated by an Equipment Inspector.
- Each piece of physical armor will be assigned to an Armor Tier based on its style that will outline its Base Armor Rating and Maximum Armor Rating. Armor that cannot be assigned to a tier does not count as armor and cannot be used as such.
- Pieces can be granted bonuses or penalties based on the quality of construction or appearance.
- The sum total of all modifiers cannot increase a piece's armor rating beyond the maxiumum allowable for its tier. Surplus bonuses confer no additional benefit.
- Armor with a final rating of zero or less (due to penalties) does not count as Armor and cannot be used as such.
- Armor Pieces are rated individually but will be averaged together when worn to produce an Armor Point Total for each Hit Location.
Armor rating can be subjective at times. To help mitigate this, it is recommended that players keep a reference sheet with a list of details for their physical armor pieces including descriptions, construction details, and previously assigned ratings to help Inspectors make quick and confident assessments. Keeping signatures and inspection dates from other Inspectors will add further credibility to your notes.
Reference Sheets are not necessary but they will greatly improve your odds of getting consistent armor ratings at every event you attend!
Armor Tiers
Armor tiers provide a base and maximum rating for physical armor pieces. Each tier includes a list of common styles that fall under that tier. Ambiguous armor pieces should be placed wherever they would be most appropriate.
| ARMOR TIERS | |||
|---|---|---|---|
| TIER | BASE RATING |
MAX RATING |
INCLUDES |
| T1 | 1 | 2 | |
| T2 | 2 | 3 | |
| T3 | 3 | 4 | |
| T4 | 4 | 5 | |
| T5 | 5 | 6 | |
| T6 | 6 | 7 | |
| Special | - | - | |
Armor Modifiers
Armor pieces can be granted bonuses or penalties to their Armor Rating based on the quality of construction or appearance. Multiple points can be awarded and penalized simultaneously as long as they each correspond to each unique feature or collection of features that would warrant the bonus or penalty if viewed on its own.
Superior Appearance
Bonus points may be awarded to armor that displays an exceptional appearance above and beyond the typical appearance of similar pieces in its style. This includes but is not limited to: tooling, etching, gilding, and fluting, as well as notable use of colors, shapes, weaves, etc. These examples do not represent an exhaustive list and consideration should be given to any piece that obviously goes above and beyond the base construction requirements to create an aesthetically pleasing piece.
Inferior Appearance
Points may be deducted from armor that displays an appearance well below the typical standard expected for similar pieces in that style. Examples include tarnished/poorly-maintained armor as well as visibly inauthentic or degraded materials. This penalty does not apply when the piece is worn as a part of a complete outfit that is intentionally designed to look shoddy or battle-worn.
Superior Construction
Bonus points may be awarded to armor constructed with exceptional techniques that provide a meaningful increase in durability over the standard for the material being used. This includes but is not limited to: solid/riveted rings, hardened material, noticeably tighter spacing than required, etc. These examples do not represent an exhaustive list and consideration should be given to any piece that obviously goes above and beyond the base requirements to create a more durable piece. This bonus may also be granted to pieces that are at least 75% constructed from metal materials that are significantly more dense and/or durable than aluminum.
Inferior Construction
Points may be deducted from armor for inferior construction techniques or a meaningful reduction in expected durability when compared to the standard for the material being used. Examples include but are not limited to: obviously unfinished armor, brittle/cracked material, loose connection points, and shoddy workmanship.
Layered Armor Bonus
If multiple unique pieces of Physical Armor are layered on top of each other as part of a complete outfit, the rating of any overlapping area will be rating of the highest-tier armor piece plus 1, up to that armor’s maximum.
- A piece of armor already at max rating will not receive any additional value from layering.
- Each layered piece should be able to act as armor on its own if it were not layered. The layers may be affixed while being worn, such as metal armor attached to an arming doublet.
- Any part of layered armor that extends beyond the layering is calculated at its normal rating.
- All layered armor pieces must be at least partially visible in a way that does not misrepresent the wearer’s armor point total or armor coverage when observed by another player from 20ft away. This especially true in the cases where a lower-tier armor is layered on top of a higher-tier piece.
- There is no additional bonus for layering more than two pieces.
Material Thickness
Certain armor styles may require materials that meet a specific thickness. Multiple layers of material may permanently affixed to each other to increase thickness however extra thickness caused by adhesives or empty space should not be factored into the new measurements.
- One bonus point may be awarded or deducted for Superior or Inferior thickness according to the chart below.
- Armor pieces that do not meet these minimum requirements may be judged as Ambiguous Armor as long as they still meet the universal equipment requirements.
| MATERIAL THICKNESS REFERENCE CHART | |||||||
|---|---|---|---|---|---|---|---|
| Inferior (Minimum) |
Standard | Superior | Notes | ||||
| Cloth | Cannot be less than standard |
1/16" 1.60mm |
1/8" 3.18mm | ||||
| Light Leather | 4oz 1/16" 1.60mm |
6oz 3/32" 2.39mm |
8oz 1/8" 3.18mm | ||||
| Heavy Leather | Cannot be less than standard |
10oz 5/32" 3.96mm |
12oz 3/16" 4.78mm |
Less than standard is Light Leather | |||
| Rigid, Non-Metal | 1/8" 3.18mm |
3/16" 4.78mm |
1/4" 6.36mm |
Material Density at least 0.9g/cm3 (equivalent to HDPE) | |||
| Aluminum | Steel | Aluminum | Steel | Aluminum | Steel | ||
| Round Rings | 18ga swg 16ga awg 0.048" 1.219mm |
20ga swg 18ga awg 0.036" 0.914mm |
16ga swg 14ga awg 0.064" 1.626mm |
18ga swg 16ga awg 0.048" 1.219mm |
14ga swg 12ga awg 0.080" 2.032mm |
16ga swg 14ga awg 0.064" 1.626mm | |
| Flat Rings | 20ga swg 18ga awg 0.036" 0.914mm |
22ga swg 20ga awg 0.028" 0.711mm |
18ga swg 16ga awg 0.048" 1.219mm |
20ga swg 18ga awg 0.036" 0.914mm |
16ga swg 14ga awg 0.064" 1.626mm |
18ga swg 16ga awg 0.048" 1.219mm |
Measure along thinnest axis. Punched rings should be comparable thickness. |
| Sheet Metal | 18ga 0.040" 1.024mm |
20ga 0.036" 0.911mm |
16ga 0.051" 1.291mm |
18ga 0.048" 1.214mm |
14ga 0.064" 1.628mm |
16ga 0.060 1.518mm | |
| Scales | 20ga 0.032" 0.812mm |
22ga 0.030" 0.759mm |
18ga 0.040" 1.024mm |
20ga 0.036" 0.911mm |
16ga 0.051" 1.291mm |
18ga 0.048" 1.214mm | |
Supplemental Armor Bonus
When calculating a player's Armor Point Total, armor worn on the head (above the neck), hands (above the wrist), or feet (below the ankle) do not contribute a normal rating towards calculations. Instead, pieces that meet the construction criteria below grant an additional +1 bonus to their respective location (torso, right arm, left arm, right leg, left leg) after all Armor Point Totals have been calculated.
- Supplemental armor pieces must cover at least 50% of the surface area of the head, hand, or foot, not including space between fingers and toes.
- They meet the Universal Equipment Requirements, as well as be constructed in a way that would place them in Tier 3 or greater.
- To ensure safety in the cases of accidental hand contact, hand armor cannot include metal or similarly rigid materials on the tops of knuckles or fingers, including fingertips. To offset this, Hand Armor can also be constructed as a Tier 2 armor so long as the final piece still looks like armor.
- This bonus can cause the armor point total to exceed tier maximums, however it will still be affected by armor point limits imposed by class or game modes.
- If hand or foot armor is the only armor piece worn on that location, then it should be compared to the normal armor tiers and assigned a normal rating as best as possible.
Calculating Armor Point Totals
Once the pieces are rated, Armor Point Totals are calculated for each Hit Location based on those ratings and the approximate physical coverage that each piece bestows.
To calculate this total, average the ratings of all physical armor pieces in the hit location based on the percentage of coverage they provide, rounding the result to the nearest whole number.
- Areas not covered by any armor whatsoever, such as gaps or garb, are not factored into this averaging.
- You do not need to be precise when determining the coverage. "Eyeballing" it is perfectly fine and is even encouraged as long as it is done in good faith.
Once the point total has been calculated, any extra points from Supplemental Armor should be added.
Lorathana is wearing a cloth bracer (rated 2pts) on her right forearm, a chainmail tunic (rated 4pts) with sleeves covering some of her arms, and a leather gauntlet. The two pieces together cover about 70% of her arms, leaving a gap at the elbow.
To make their calculations, the Equipment Inspector only has to focus on the area covered by armor. Looking at her arm, they determine that the bracer takes up about 40% of the armored area and the chainmail sleeve takes up about 60% of the armored area. The Gauntlets are Supplemental Armor so they are ignored until later.
[Bracer] 2pts x 40% = 2 x 0.40 = 0.8
[Sleeve] 4pts x 60% = 4 x 0.60 = 2.4
0.8 + 2.4 = 3.2 rounds down to 3.
Now that the total has been calculated, Lorathana can add the Supplemental Armor bonus for her Gauntlets, granting an additional +1.
Therefore, Lorathana’s right arm has an Armor Point Total of 4pts in the areas covered by armor (the bracer, the sleeve, and the gauntlets) and an exposed gap between them.
Still confused? More examples can be found here.
Armor Styles
Each Armor Tier includes a list of common Armor Styles that fall under that tier. Those styles are presented here in greater detail to help players and inspectors more accurately assess their armor. Ambiguous armor pieces should be assessed on a case-by-case basis.
| ARMOR TIERS | |||
|---|---|---|---|
| TIER | BASE RATING |
MAX RATING |
INCLUDES |
| T1 | 1 | 2 | |
| T2 | 2 | 3 | |
| T3 | 3 | 4 | |
| T4 | 4 | 5 | |
| T5 | 5 | 6 | |
| T6 | 6 | 7 | |
| Special | - | - | |
Cloth/Padded Armor
This style includes armor made of fabric, padding, and/or synthetic equivalents.
- Is a Tier 1 armor style.
- Must meet the Universal Equipment Requirements.
- Minimum Material Thickness of 1/16" (1.60mm)
Light Leather
This style includes armor made of thin leather, hides, furs and their synthetic equivalents.
- Is a Tier 2 armor style.
- Must meet the Universal Equipment Requirements.
- The standard Material Thickness is 6oz (3/32") (2.39mm).
Butcher's Mail, Sharkmail, etc
This style includes armor composed of machine-made weaves of very small rings.
- Is a Tier 2 armor style.
- Must meet the Universal Equipment Requirements.
- Only welded Butcher's Mail, Sharkmail, Ringmesh, or similar chain mesh may be used. Because of this, there are no specific Material Thickness requirements or modifiers.
- Any weave is permitted but it must not allow a 1/8" dowel to pass through
- Does not gain a bonus for being made from Steel or similar metal.
Heavy Leather
This style includes armor made of thick leather, hides, furs and their synthetic equivalents.
- Is a Tier 3 armor style.
- Must meet the Universal Equipment Requirements.
- The standard Material Thickness is 10oz (5/32") (3.96mm).
Rigid Non-Metal Armor
This style includes all predominantly rigid non-metal armor that would fall under Tiers 4/5/6 if they were made from metal.
- Is a Tier 3 armor style.
- Must meet the Universal Equipment Requirements.
- Must meet the requirements for the tier/style it is mimicking, other than material thickness.
- Material density must be at least 0.9g/cm3 (equivalent to HDPE).
- The standard Material Thickness is 3/16" (4.78mm).
Chainmail
This style includes flexible armor consisting of a weave of interlocked metal rings.
- Is a Tier 3 armor style.
- Must meet the Universal Equipment Requirements.
- Any weave is permitted but it must not allow a 1/2" dowel to pass through.
- Rings must have Aspect Ratio (AR) of 8 or less.
- Metal must be at least equivalent to Aluminum in density and durability. (2.7g/cm3)
- The standard Material Thickness for rings is based on the metal used:
- Aluminum Round Rings: 16ga swg (0.064") (1.626mm)
- Aluminum Flat Rings: 18ga swg (0.048") (1.219mm)
- Steel Round Rings: 18ga swg (0.048") (1.219mm)
- Steel Flat Rings: 20ga swg (0.036") (0.914mm)
Light Scale
This style includes armor created with overlapping scales secured to each other along one edge using rings or a flexible backing. Scales are individually mobile and are not held into firm contact with the others. Scale armor with rigid or immobile scales is classified as Heavy Scale.
- Is a Tier 4 armor style.
- Must meet the Universal Equipment Requirements.
- Scales must overlap by at least 10%.
- Any backing material must not be visible through the scales.
- Scales must be a metal at least equivalent to Aluminum in density and durability. (2.7g/cm3)
- The standard for Material Thickness is based on the metal used:
- Aluminum Scales: 18ga (0.040") (1.024mm)
- Steel Scales: 20ga (0.036") (0.911mm)
- For rings and backing materials, consult the Material Thickness chart.
Heavy Scale
This style includes armor created with overlapping scales secured to each other along one edge against a backing to create a rigid shell rather than individually mobile scales. Scale armor with loose scales is classified as Light Scale.
- Is a Tier 5 armor style.
- Must meet the Universal Equipment Requirements.
- Scales must overlap by at least 10%.
- The backing material must not be visible through the scales.
- Metal must at least equivalent to Aluminum in density and durability. (2.7g/cm3)
- The standard for Material Thickness is based on the metal used:
- Aluminum Scales: 18ga (0.040") (1.024mm)
- Steel Scales: 20ga (0.036") (0.911mm)
- For rings and backing materials, consult the Material Thickness chart.
Butted Plate (Splint, Kikko, etc.)
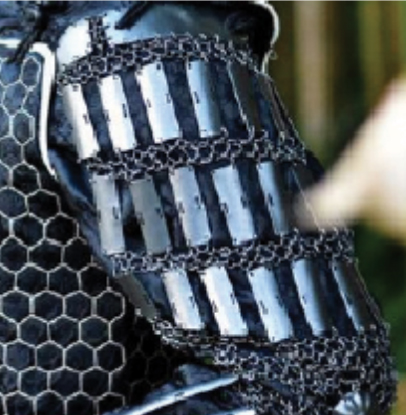
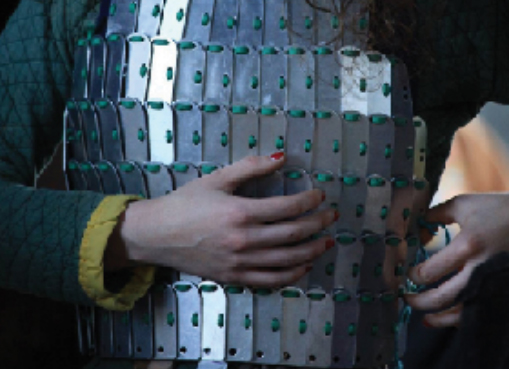
This style includes armor that consists of numerous metal plates attached to a backing or linked by cord, chain, or by some other method. This armor is often flexible with numerous seams and joints between plates. This armor will deform locally when struck rather than spreading out impact over a large area
- Is a Tier 5 armor style.
- Must meet the Universal Equipment Requirements.
- Plates spaced no more than 0.5" apart.
- Plates must cover at least 75% of the armor.
- Metal must at least equivalent to Aluminum in density and durability. (2.7g/cm3)
- The standard for Material Thickness is based on the metal used:
- Aluminum Plates: 16ga (0.051") (1.291mm)
- Steel Plates: 18ga (0.048") (1.214mm)
- For rings and backing materials, consult the Material Thickness chart.
Lamellar and Laminar
This style includes armor that is constructed from numerous metal plates, connected to each other in an overlapping fashion by cord, chain link, or similar methods. Examples may include lorica segmentata, manica, okegawa-dō, anima, and other styles. Unlike Heavy Scale, the plates of this type of armor are firmly connected to each other. Mobility is provided by the small amount of flex and slack in the attachment between the individual plates.
- Is a Tier 6 armor style.
- Must meet the Universal Equipment Requirements.
- Plates must overlap by at least 10%.
- Plates connect directly to each other without any backing for support.
- Metal must at least equivalent to Aluminum in density and durability. (2.7g/cm3)
- The standard for Material Thickness is based on the metal used:
- Aluminum Plates: 16ga (0.051") (1.291mm)
- Steel Plates: 18ga (0.048") (1.214mm)
Brigandine
This style includes armor that is constructed from numerous shaped and fitted metal plates solidly connected along a supporting shell of heavy cloth (such as canvas, denim, or velvet) in such a way that when worn all plates are held together firmly and follow the general contours of the body. The plates are typically placed on the inside of the shell, presenting only fabric and rivets to the observer for a very clean and customizable appearance.
- Is a Tier 6 armor style.
- Must meet the Universal Equipment Requirements.
- 75% of plates must overlap by at least 10% of their surface.
- Plates need only be attached along one edge but must be held firmly against each other when the armor is worn.
- Metal must at least equivalent to Aluminum in density and durability. (2.7g/cm3)
- The standard for Material Thickness is based on the metal used:
- Aluminum Plates: 16ga (0.051") (1.291mm)
- Steel Plates: 18ga (0.048") (1.214mm)
Plate
This style includes armor is constructed from large pieces of metal connected together to form a solid shell that spreads impact over a large surface area. Plate armor will not deform locally when struck, and will instead behave as a single contiguous whole. The individual metal pieces are shaped and fitted to articulate together and follow the contours of the body.
- Is a Tier 6 armor style.
- Must meet the Universal Equipment Requirements.
- 75% of the plates used must be large enough to cover at least 10% of the full Hit Location. Joint articulations are exempt from this requirement.
- Metal must at least equivalent to Aluminum in density and durability. (2.7g/cm3)
- The standard for Material Thickness is based on the metal used:
- Aluminum Plates: 16ga (0.051") (1.291mm)
- Steel Plates: 18ga (0.048") (1.214mm)
Ambiguous Armor
For armor pieces that are ambiguous, the equipment inspector should compare it to each tier as a whole and do their best assign to the tier they feel is most appropriate based on factors such as materials, weight, flexibility, and visuals (see guide below).
- Inspectors should reference similar styles and materials to help gauge what bonuses or penalties may be appropriate.
- Ambiguous Armor must still meet the Universal Equipment Requirements.
Below is a simple guide that inspectors may use to gauge the best tier for an ambiguous piece of armor. Use this knowledge alongside existing styles to help place the armor in a tier that is fair for everyone.
- Non-Metal Tier Cap: Non-metal armors should not be placed higher than Tier 3, regardless of the factors below.
- Weight: Heavier armor should be placed higher, but only to a limit. The lowest tier armors are quilted cloth (0.03 lbs/sqft) and the highest tier armors are 14ga aluminum plate (approx. 1 lbs/sqft). Extra weight beyond these bounds should receive no additional consideration, however steel-like materials may receive a separate construction bonus afterwards. Weight added for no reason other than to add weight should likewise be disregarded.
- Flexibility: The more rigid the armor is, the higher it should be placed. The lowest tier armors are fabric and the highest tier armors are reinforced metal plates.
- Tiebreaker - Visuals: If there is difficulty deciding between two tiers, visual appearance can act as a tiebreaker to nudge the decision one way or the other.
- Helpful Benchmarks: Consider using these benchmarks to help peg an initial placement and then fine tune it using the other criteria above.
- Ambiguous armor that meets the universal equipment requirements is always eligible for Tier 1 at minimum.
- Ambiguous armor that is primarily rigid and non-metal should be placed roughly around Tier 2 or Tier 3.
- Ambiguous armor that is primarily metal and primarily rigid should be placed roughly around Tier 4 or Tier 5.
Color Code
We encourage playtesters to attempt to adhere to the Color Code and Color Blind Aids if possible, however we understand that this might not be reasonable for all players at this time. Since we don't want to see people left out of playtesting, organizers may allow participants to forego the Color Blind Aids (the extra color stripe) for now.
That said, if your park has members with color blindness or other visual impairments, we encourage you to try to create a proper set of Color Coded equipment so that we can get feedback about whether or not it helps their experience in the way we are anticipating.
Thanks for your understanding. Happy Playtesting!
- The V9 TeamSometimes a certain color will be required in order to convey additional information about an effect on the battlefield. This is commonly required for sashes, spellballs, and specialty arrows.
In an effort to improve visual recognition and provide better accessibility for our players with visual impairments, Amtgard V9 uses a Color Code system to regulate these mandatory colors.
All equipment that requires a specific color must adhere to the following Color Code rules:
- Color Swatch: The color used must be visually similar to the corresponding swatch shown above. It is not required to match the color exactly so long as it does not create confusion during gameplay. Occasional confusion in the chaos of battle should be expected however repeated incidents will require the color to be replaced with something more appropriate.
- If there is ever confusion, a color belongs to whichever swatch it most closely resembles. If a color appears to be equally similar to multiple swatches then it should not be used at all.
- Color Blind Aids: All Color Coded equipment must also include a secondary color to assist with identification for those with a vision impairment. This color must be included in a way that is clearly understood to be the secondary color, be easily identifiable from 20ft away, and be placed in a conspicuous location on that piece of equipment. We recommend the following:
- For Arrows and Spellballs: a thick line across the front face.
- For Sashes, place a thick line across the narrow portion of the sash, roughly at heart-level. Adjust the placement as needed to avoid obstruction by shield or garb.
- Use double-lines if the sash has other designs that might pull focus.
- Use double-lines if the sash has other designs that might pull focus.
Developer Note: Color Blind Aids do not need to be permanently integrated into the object. They can be affixed separately by tying a strip of the appropriate color via any safe means. This is especially relevant during playtesting where the colors themselves may change frequently.
Visual Indicators
Visual Indicators are a functional piece of garb that serves to provide at-a-glance information to other players on the field. While Amtgard uses a number of standardized Visual Indicators, custom indicators can also be created for specific events, such as Team Headbands.
Sashes
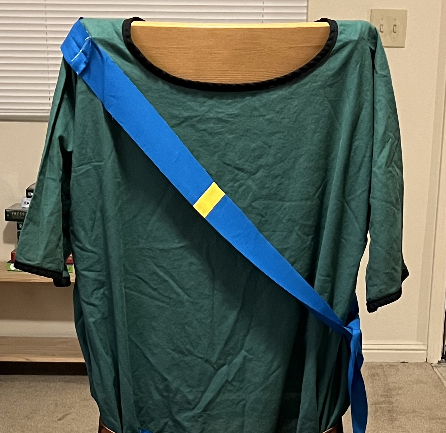
Sashes are primarily used to denote a player's Class. They must be worn from the shoulder to the opposite hip across the body in a manner that not obscured by garb or other equipment.
Construction Rules
- Must be at least 2" wide.
- Every sash is associated with an class or custom rule and must match the appropriate Color Code.
- Color blind aids should run across the sash short-ways (see image). We recommend placing the lines on either side of the player, roughly at heart-level; however you can adjust the placement to suit your kit and avoid obstruction by shield or garb. Use double-lines for better visibility or if the sash has other designs that might pull focus.
Equipment Equipment Basics · Equipment Use Terms · Weapons · Shields · Armor · Color Code · Visual Indicators
