Flat blade
| This article may require cleanup. The specific problem is: insulting the author. Relevant discussion may be found on the talk page. Please help improve this article if you can. (April 2016) |
'An elegant weapon... for a more civilized age' Obi Wan Kenobi
Contents
A History of Flat Blades in Amtgard
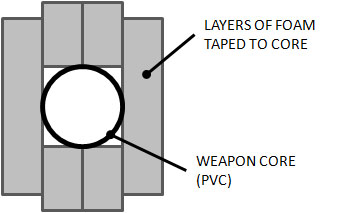
Flat Blade technology in Amtgard dates back to the late 80’s and early 90’s. The first flat blade variant was built by Sir Ahira Bandylegs of the Burning Lands and was a slender box shaped blade with bulbous tip, built for Sir Naes Weissdrake. This sword was constructed with ¾ inch PVC pipe, an early version of camp pad foam, and fiberglass reinforced strapping tape.
Original Box Sword Cross Section
The flat blade was developed for a number of reasons. The first and foremost was that it looked a lot more like a real sword and behaved more like a real sword than the foam smith technology at the time. Early Amtgard swords were “boffer” weapons made from PVC and soft foam, similar to couch foam, and were heavy and cumbersome. Flat blades overcame weight problems by using lighter foams and less of them. Flat blades also had an advantage of narrow shot placement, allowing shots to be thrown into slot areas like the shoulder between the head and blocking sword, something that the larger swords of the time were not able to do.
The next generation of flat blades was developed by Sir Terarin. These were shaped blades that mimicked sabers and scimitars. The swords were built using ½ inch or ¾ inch PVC pipe, heated and formed in an oven, with soft couch foam cut into a blade shape and taped to the core. The design allowed for any size and shape of blade, but was too soft to prevent strikes from coring people under normal usage.
The third generation of the flat blade was again developed by Sir Ahira Bandylegs, circa 1990. This was a Roman gladius design built with ¾ inch bamboo using thin strips of foam in layers to give the blade shape. This was the first introduction of US Army camp pad foam, also known as “mean green” foam. Each strip was meticulously taped down to prevent the layers from coming apart. An important feature to this blade was that the layers of foam only covered the two striking edges. There was no foam on the sides. This variant of the flat blade saw limited use on the field before it was made obsolete by the 4th generation blade design. The fourth generation flat blade, circa 1990, was developed by Sir Naes Weissdrake and Sir Terarin. This design was an evolution of Ahira’s gladius. It utilized PVC core, with one or two core width strips of foam glued to each striking side of the core, one strip of foam glued to each flat side, and then another one or two wider strips glued to the striking edges. This variant was the second to use Army camp pad foam, and was the first to utilize spray adhesive and contact cement to bond the foam. At this time, complex basket hilts were built from foam to offer hand protection, and single striking edge swords were common. Additionally, the techniques used to build flat blade swords were now applied to a number of other shaped weapons, to include axes, flanged maces, and spear tips.
A flat blade variant was brought to the Burning Lands by Sir Aron of the Emerald Hills, circa 1991. This was a short lived version that used a PVC core with camp pad sandwiching the core in several broad layers. These blades were three times larger than the Naes/Terarin variant and were significantly heavier.
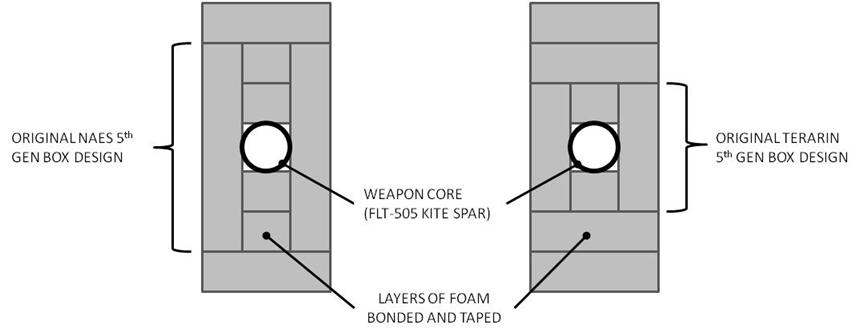
The fifth generation of the flat blade was developed in 1993 by Sir Naes and Sir Terarin. Fiberglass kite tube was introduced to Amtgard by the Empire of the Iron Mountains, and it immediately became the core of choice for creating lighter and faster swords. Several core sizes were tested between ¼ inch diameter and ¾ inch diameter. Ultimately, the ½ inch .505 fiberglass tube was determined to be a superior compromise between weight and strength. Blade construction did not change. Flat blades had the trifecta of perfect materials: Army camp pad foam, fiberglass tube, and adhesives.
5th Generation Flat Blade Cross Section
It is the fifth generation of flat blades that became the gold standard for shaped weapon design. Sir Nikos Weissdrake and Sir Talinor Darkwolf of the Burning Lands, and Sir Bertrand of Dragonspine all further refined techniques in the early- and mid-90’s and experimented with additional weapon styles ranging from axes to glaives to throwing weapons. Furthermore, flat blade designs found their way to Dagorhir in the mid-90’s and variants of the Naes/Terarin 5th-gen blade became common. Dagorhir foam smiths naturally evolved the 5th-gen blade design, but the basic construction is standard.
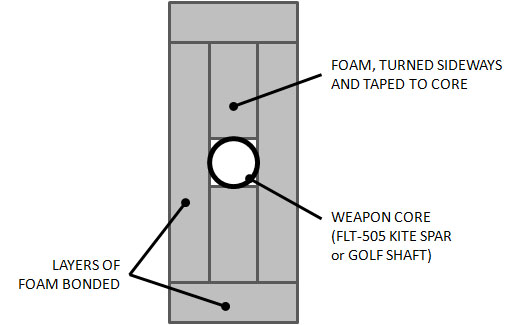
A sixth generation of flat blade design was developed in recent year by Sir Celdic Fitz Caliston of Desert Winds. This design uses a single layer of camp pad foam, turned sideways and taped to the core, with side pieces and striking edge pieces bonded to the blade with contact cement. Its cross section resembles a hybrid of first and fifth generation designs.
6th Generation Flat Blade Cross Section
Today flat blade swords are more of a choice. Where flat blades were the answer to overcoming size and weight of the original Amtgard boffers, ultra light foam tech – to include golf shaft cores and pool noodle foam – has made the advantages of flat blades obsolete. The continued advantage of flat blade tech is that it allows for weapon design to be aesthetically unique.
Tutorial :: Building the 5th Gen Flat Blade by Sir Terarin
The following is the process used for building the 5th generation flat blade, which is proven to be a lightweight and durable design.
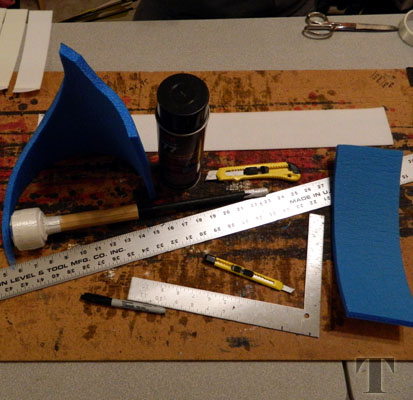
Materials:
- Fiberglass Kite Spar, FL-505, ~0.5” outer diameter
- Closed cell foam, camping pad, ~0.5” thickness
- 3M Spray Adhesive, alternatively use DAP Woodweld contact cement
- Strapping Tape, fiberglass reinforced, 1” wide
- Utility knife
- Metal straight edge, preferably a yard stick or meter stick
One of the critical things to note about flat blade construction is that all pieces need to have clean, accurate cuts. It is important that any cutting blade is very sharp, a metal straight edge is used to keep cuts clean and straight, and that measurements are precise
Preparation:
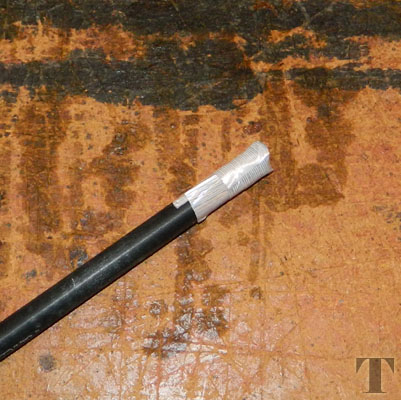
Make sure the core is clean and cap the raw end. Cut a small square of foam and tape it over the fiberglass kite spar. Use strapping tape to do this. Don’t be afraid to use too much.
Step 1: Inside Strike Edge Layers
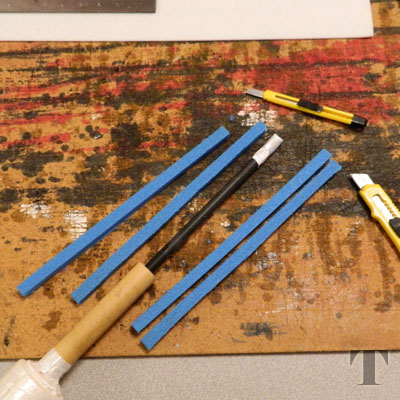
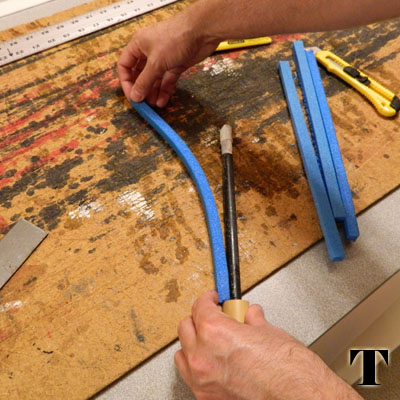
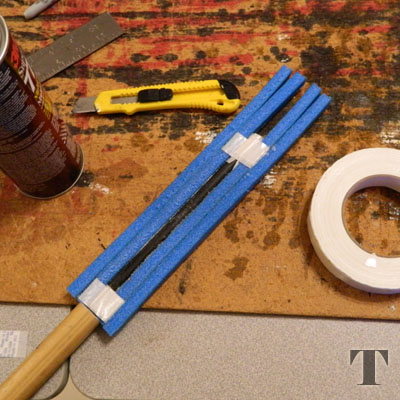
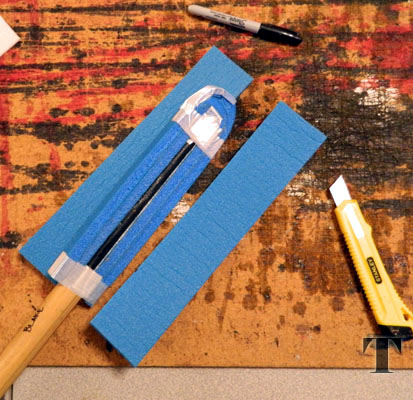
The first four layers of the flat blade create the main padding on the striking edges. These are strips of foam that are longer than the overall blade length and as wide as the outer diameter of the core. The example below is a flat blade dagger with two striking edges. The four strips of foam are cut at 0.5” wide and about 12” long.
It is very important that the measurement is precise and the cut is a clean, straight line. Do not let your blade “wobble” and keep the cut perpendicular to the foam. Imprecise cuts will lead to odd bulges in the blade and the risk of components not gluing tightly together.
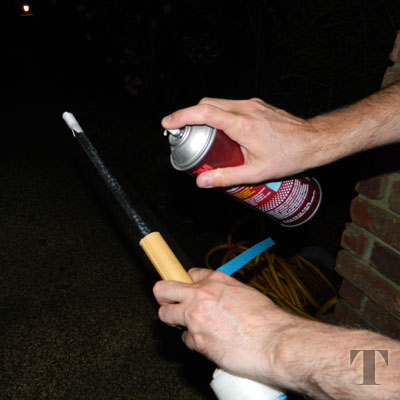
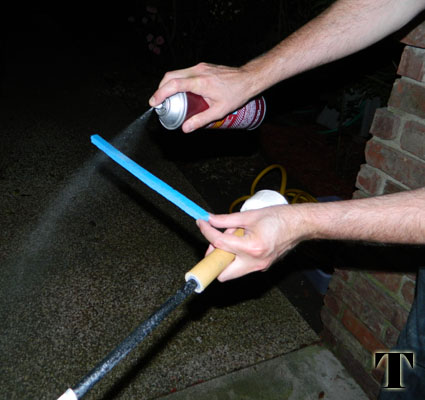
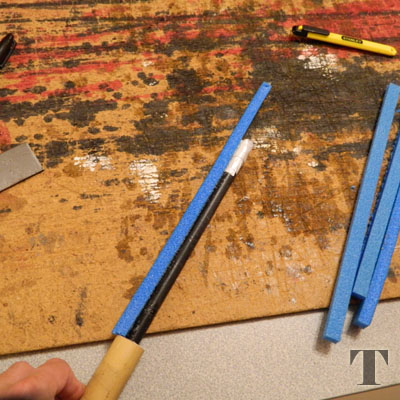
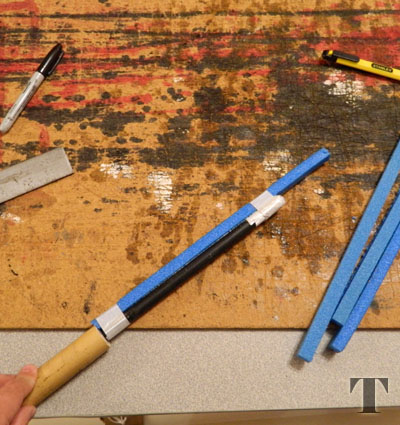
In this example, spray adhesive is applied to one side of the first foam strip and to one side of the core. Allow both sides to get tacky. Waiting 3-5 minutes is usually good. Once sufficiently tacky, lay the core and foam sideways on a smooth surface and press the foam to the core so that the two adhesive sides bond. The reason to do this sideways is so that the foam will bond straight and not have any waves along the length of the blade. For added security, use the strapping tape to hold down each end.
The second layer of foam is glued to the opposite side of the core, using the same technique as the first.
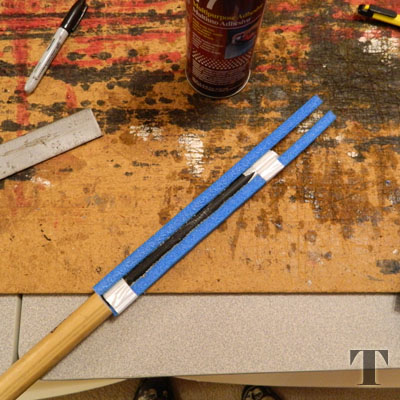
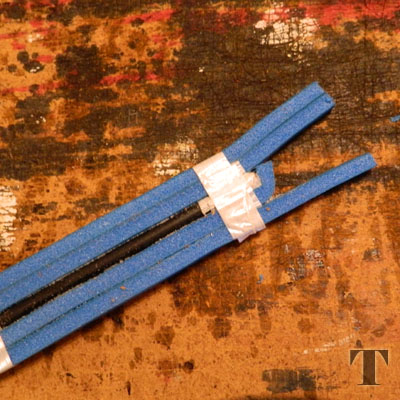
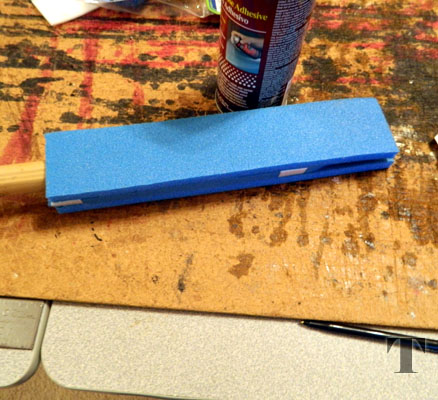
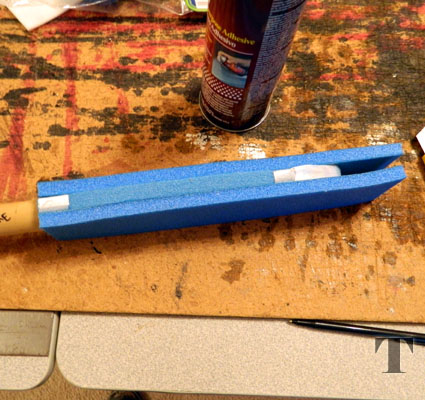
The third and fourth layers are glued down to the first and second layers. Do one at a time, apply adhesive to both parts being bonded, wait for them to get tacky, and bond the layers with the blade flat on a smooth surface to avoid any waves.
Use strapping tape to secure the foam. Not much is required.
Step 2: The Tip
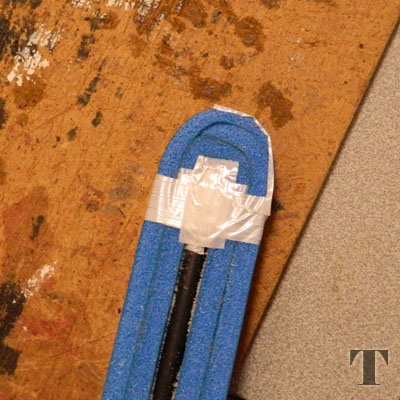
The tip of the sword will be built by folding layers of foam over the end of the core. Fold one of the innermost layers over the cap and tape it down. The foam only needs to cover the tip. Excess foam will be trimmed off. Next, fold the other inside layer over the first. The adhesive on the one side of the foam should be tacky enough to hold this temporarily. Next, alternate between folding the outer most layers of the tip. Excess foam for each folded piece will need to be cut off. Tape the foam well, compressing it only a little.
Step 3: The Sides
The side pieces are what you use to give flat blades unique shapes. You can cut flares, recesses, waves, anything at this point. In this example the dagger blade is simple and straight.
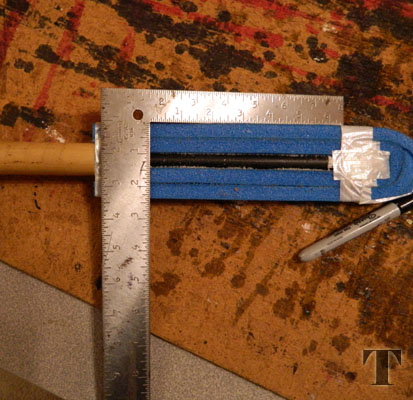
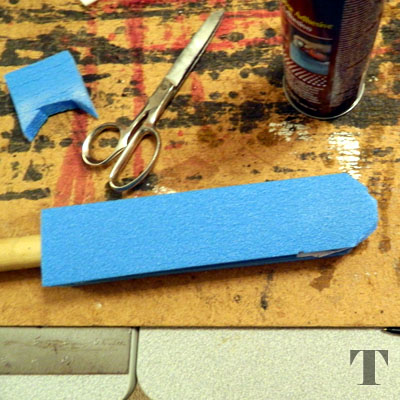
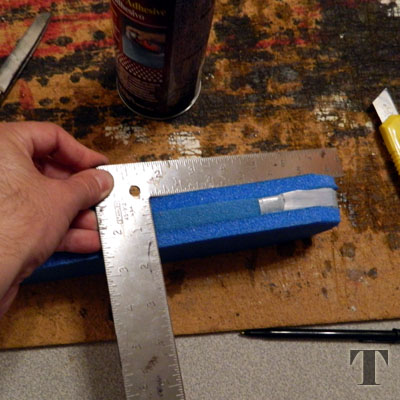
Measure the width of the blade in work. This is going to be the width of the side pieces. Again, it is very important that the measurement is precise and the cut is a clean, straight line. Do not let your blade “wobble” and keep the cut perpendicular to the foam. Imprecise cuts will lead to odd bulges in the blade and the risk of components not gluing tightly together.
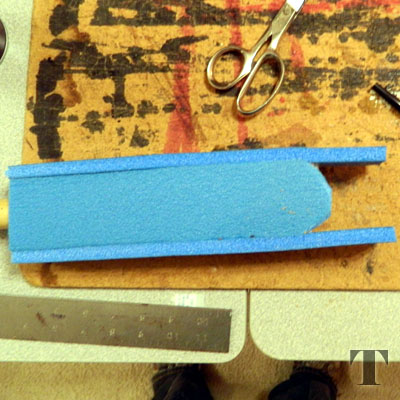
Bond the side pieces one-at-a-time to the blade, using the spray adhesive. Again, take advantage of a smooth, flat surface to make sure the pieces bond flat and square to one another. No tape is necessary at this point.
Note that the sides have been cut with the rounded end that fits the desired tip design.
Step 4: The Outside Strike Edge
The final layers of foam give the flat blade its smooth striking surface and form a box with the side pieces. The box shape gives the blade a lot of durability and improves the safety of the weapon.
Measure the width of the striking edge as shown.
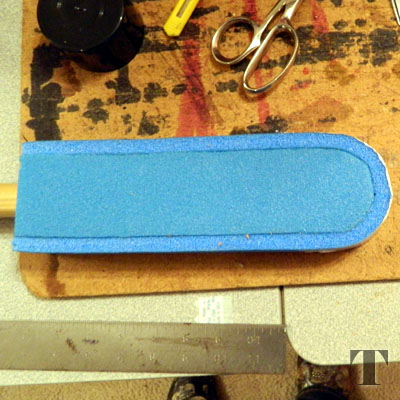
Keep all cuts clean and straight; cut the final layers. Bond these to the blade using the same technique as before. Apply adhesive to the foam strip and the blade edge, wait until tacky, bond against a flat surface. Repeat for other side.
The final layer of the tip will be folding the outside, striking edge layers over the rounded sides and joining them at the middle.
At this point it is a good idea to tape down the tip to secure the foam. It is useful to apply tape to the sides of the tip to prevent tearing. Do not apply a lot of tape to the striking edge.
Step 5: Finish the Weapon
With the blade on, the weapon is now ready for all finishing work. This includes adding a handle, pommel, and cover.
