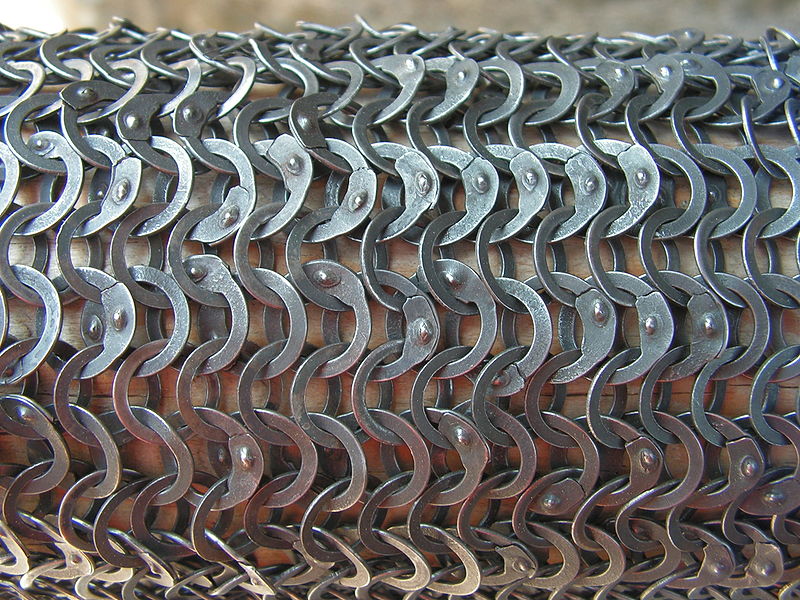
Riveted Chainmail (V7)
A type of Armor (V7)
According to the Rulebook (V7)
"chain in which all the links have been individually riveted together." This armor is worth a base of 4 Armor Points (V7).
Riveted Mail
Several patterns of linking the rings together have been known since ancient times, with the most common being the 4-to-1 pattern (where each ring is linked with four others). In Europe, the 4-to-1 pattern was completely dominant. Mail was also common in East Asia, primarily Japan, with several more patterns being utilised and an entire nomenclature developing around them. Historically, in Europe, from the pre-Roman period on, the rings composing a piece of mail would be riveted closed to reduce the chance of the rings splitting open when subjected to a thrusting attack or a hit by an arrow.
Up until the 14th century European mail was made of alternating rows of both riveted rings and solid rings. After that it was almost all made from riveted rings only. Both would have been made using wrought iron. Some later pieces were made of wrought steel with an appreciable carbon content that allowed the piece to be heat treated. Wire for the riveted rings was formed by either of two methods. One was to hammer out wrought iron into plates and cut or slit the plates. These thin pieces were then pulled through a draw-plate repeatedly until the desired diameter was achieved. Waterwheel powered drawing mills are pictured in several period manuscripts. Another method was to simply forge down an iron billet into a rod and then proceed to draw it out into wire. The solid links would have been made by punching from a sheet. Forge welding was also used to create solid links, but the only known example from Europe is that of the 7th century Coppergate mail drape. Outside of Europe this practice was more common such as the well known "theta" links from India.
How To
By eHow
Things You’ll Need:
- Anvil
- Mandrel
- Gloves
- Snips or a saw
- Pliers
- Riveter and rivets
- Torch
- Wire
Get your tools together. You will need a riveter, a pair of pliers, something to wind the metal wire around (called the mandrel) and a saw or pair of snips to cut the wire. A hammer can help you flatten the ends of the loops, making it easier to rivet. You will also need to acquire the wire.
Decide what you want to make. You can make a glove, a hauberk (body covering), a coif (head covering), or even something simple and fashionable, such as a belt. The belt may be a good place to start if you have never made chain mail before. It will let you practice. Step
Start making the rings. Wrap the wire tightly around your mandrel. You may need to heat it up first using a torch. Be careful not to burn yourself.
Cut the rings. Use a saw or tin snips. If you plan on riveting the rings (which is the traditional method of making chain mail), flatten the very tips of the rings. Make dozens or hundreds of rings at a time. Mass production techniques can save you a lot of time.
Get your pattern for whatever you intend to make. You will not need one for a belt, but you will need basic measurements for a hauberk. You can use an old shirt. Cut along the seams for the sections. For a coif, you can use a hood.
Start linking the rings. There are a number of patterns you can use. Check out the link in the resources box for a more detailed explanation of linking patterns. You will have to rivet the links one by one.
Once you have each panel of your chain mail item completed, link them together. Use links of chain to attach each panel. It will not hurt to double up your links at the seams.
Finish the item. When you wear it, you will have to wear some kind of padding under the armor. Heavy quilted or leather armor was used in the past for protection from stabbing and bludgeoning attacks.
- How to by Rev. George
- Make chain
- Buy Chain
- Making Mail
- Making mail
- buy mail
