Difference between revisions of "Wrap pants"
From AmtWiki
| Line 12: | Line 12: | ||
a single pair of wrap pants. | a single pair of wrap pants. | ||
*1 1/2 yards material (60” wide) | *1 1/2 yards material (60” wide) | ||
| − | *1 Spool of thread, matching material | + | *1 Spool of thread, matching material ''Sewing Machine (Hint: If working with heavy fabrics such as denim, corduroy, vinyl or fur, you might wish to purchase a pack of needles for your machine rated for leather or denim.)'' |
| − | ''Sewing Machine (Hint: If working with heavy | ||
| − | fabrics such as denim, corduroy, vinyl or fur, you | ||
| − | might wish to purchase a pack of needles for your | ||
| − | machine rated for leather or denim.)'' | ||
*Scissors | *Scissors | ||
*Fabric pencil or ‘map color’ pencil (to trace pattern onto cloth) | *Fabric pencil or ‘map color’ pencil (to trace pattern onto cloth) | ||
Revision as of 20:04, 4 November 2008
History of the wrap pant
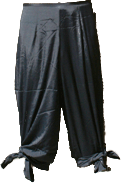
Similar styles to the wrap pants we know to day are worn in India and in some parts of tropical asia. Today the pants we know are popular with hippies and larpers. They have no direct historical basis.
How to make Wrap Pants
Materials
You will need the following supplies to create
a single pair of wrap pants.
- 1 1/2 yards material (60” wide)
- 1 Spool of thread, matching material Sewing Machine (Hint: If working with heavy fabrics such as denim, corduroy, vinyl or fur, you might wish to purchase a pack of needles for your machine rated for leather or denim.)
- Scissors
- Fabric pencil or ‘map color’ pencil (to trace pattern onto cloth)
- An iron (*optional)
Directions
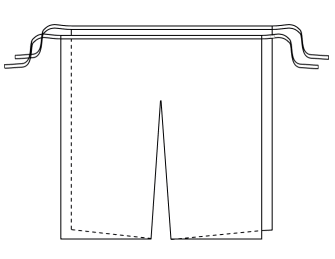
- Cut two rectangular fabric pieces against the selvage sized 30 by 50 inches. Fold the pieces in half so that your pieces now measure 30 by 25 inches.
- Put the pieces on top of each other so that the folded edges lie to your right. Mark a rectangle in the top right corner of the fabric pieces with your chalk measuring 12 inches high and 4 inches long.
- Draw a curved line inside the rectangle, taking up as much of the rectangle as possible. Remove the curved piece from the top of your fabric with scissors.
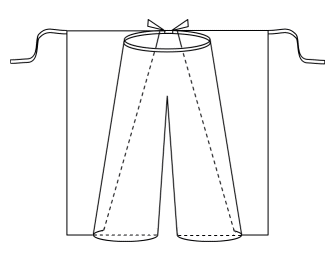
- Open the large rectangles so that the right side of the fabric matches. You must stitch the rectangles along the curved line to fashion the crotch seam.
- Fold the seamed edges over 1½ inches to form the casing for the ribbon at the waist. Stitch along this line, leaving enough open room at the end to insert the ribbon.
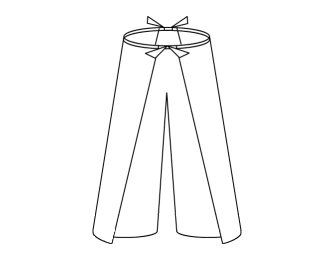
- Finish the edges of the pants by using a zigzag stitch for strength across the hem and down the sides. Insert the ribbon through the casing and pull through with a safety pin. Sew the ribbon in place at the seam to keep it in place during washing.
Links
- How to make wrap pants by Vaargard
- how to by eHow


