Difference between revisions of "Wrap pants"
From AmtWiki
| Line 5: | Line 5: | ||
not incorporate ties. ]] | not incorporate ties. ]] | ||
| + | ===History of the wrap pant=== | ||
| + | ===How to make Wrap Pants=== | ||
| + | '''Materials'''<br> | ||
| + | You will need the following supplies to create | ||
| + | a single pair of wrap pants. | ||
| + | *1 1/2 yards material (60” wide) | ||
| + | *1 Spool of thread, matching material | ||
| + | ''Sewing Machine (Hint: If working with heavy | ||
| + | fabrics such as denim, corduroy, vinyl or fur, you | ||
| + | might wish to purchase a pack of needles for your | ||
| + | machine rated for leather or denim.)'' | ||
| + | *Scissors | ||
| + | *Fabric pencil or ‘map color’ pencil (to trace pattern onto cloth) | ||
| + | *An iron (*optional) | ||
| − | [http://www.amtgard-wl.com/library/howtos/how2wrap.pdf How to make wrap pants] by [[Vaargard]] | + | '''Directions'''<br> |
| + | # Cut two rectangular fabric pieces against the selvage sized 30 by 50 inches. Fold the pieces in half so that your pieces now measure 30 by 25 inches. | ||
| + | #Put the pieces on top of each other so that the folded edges lie to your right. Mark a rectangle in the top right corner of the fabric pieces with your chalk measuring 12 inches high and 4 inches long. | ||
| + | #Draw a curved line inside the rectangle, taking up as much of the rectangle as possible. Remove the curved piece from the top of your fabric with scissors. | ||
| + | #Open the large rectangles so that the right side of the fabric matches. You must stitch the rectangles along the curved line to fashion the crotch seam. | ||
| + | #Fold the seamed edges over 1½ inches to form the casing for the ribbon at the waist. Stitch along this line, leaving enough open room at the end to insert the ribbon. | ||
| + | #Finish the edges of the pants by using a zigzag stitch for strength across the hem and down the sides. Insert the ribbon through the casing and pull through with a safety pin. Sew the ribbon in place at the seam to keep it in place during washing. | ||
| + | |||
| + | ====Links==== | ||
| + | *[http://www.amtgard-wl.com/library/howtos/how2wrap.pdf How to make wrap pants] by [[Vaargard]] | ||
| + | *[http://www.ehow.com/how_2095999_sew-wrap-pants.html how to] by eHow | ||
[[Category:Amtgard Things]] [[Category:Amtgard Terms]] | [[Category:Amtgard Things]] [[Category:Amtgard Terms]] | ||
Revision as of 19:54, 4 November 2008
History of the wrap pant
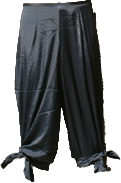
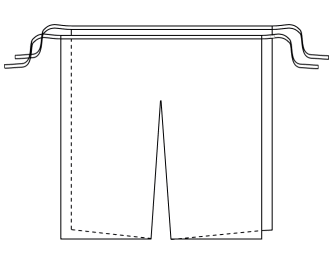
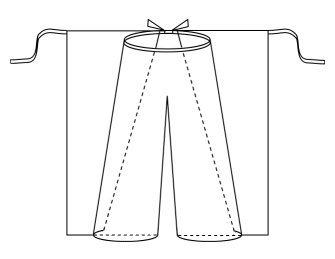
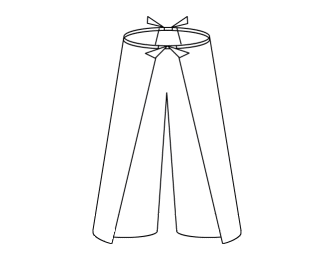
How to make Wrap Pants
Materials
You will need the following supplies to create
a single pair of wrap pants.
- 1 1/2 yards material (60” wide)
- 1 Spool of thread, matching material
Sewing Machine (Hint: If working with heavy fabrics such as denim, corduroy, vinyl or fur, you might wish to purchase a pack of needles for your machine rated for leather or denim.)
- Scissors
- Fabric pencil or ‘map color’ pencil (to trace pattern onto cloth)
- An iron (*optional)
Directions
- Cut two rectangular fabric pieces against the selvage sized 30 by 50 inches. Fold the pieces in half so that your pieces now measure 30 by 25 inches.
- Put the pieces on top of each other so that the folded edges lie to your right. Mark a rectangle in the top right corner of the fabric pieces with your chalk measuring 12 inches high and 4 inches long.
- Draw a curved line inside the rectangle, taking up as much of the rectangle as possible. Remove the curved piece from the top of your fabric with scissors.
- Open the large rectangles so that the right side of the fabric matches. You must stitch the rectangles along the curved line to fashion the crotch seam.
- Fold the seamed edges over 1½ inches to form the casing for the ribbon at the waist. Stitch along this line, leaving enough open room at the end to insert the ribbon.
- Finish the edges of the pants by using a zigzag stitch for strength across the hem and down the sides. Insert the ribbon through the casing and pull through with a safety pin. Sew the ribbon in place at the seam to keep it in place during washing.
Links
- How to make wrap pants by Vaargard
- how to by eHow


