Difference between revisions of "Omni Covers The Easy Way"
(Cover tutorial) |
|||
| (3 intermediate revisions by one other user not shown) | |||
| Line 1: | Line 1: | ||
| + | by [[Arrakis]] | ||
| + | |||
== Materials and Tools Needed == | == Materials and Tools Needed == | ||
*an appropriate length of cloth. Cotton and Polycotton broadcloth and quilting cotton are generally good choices. | *an appropriate length of cloth. Cotton and Polycotton broadcloth and quilting cotton are generally good choices. | ||
| Line 8: | Line 10: | ||
<gallery> | <gallery> | ||
| − | cover1.jpg|Measure around your omni with a tailor's measuring tape or with a string that you then measure with a ruler. Cut a rectangle of fabric | + | cover1.jpg|Measure around your omni with a tailor's measuring tape or with a string that you then measure with a ruler. Cut a rectangle of fabric at least 4" longer than the length you want to cover and 1/2" wider than your omni is around. (This assumes 1/4" seam allowance; adjust to your preferred seam allowance). Sew it up the long side to create an open tube. Test fit and resew the seam if needed to tighten the cover as desired. Finish the raw edge with a zigzag stitch or overlock or your favorite seam finish. |
| − | cover2.jpg|Sew straight across the tip from the seam to close it. | + | cover2.jpg|Sew straight across the tip from the seam to the fold to close it. You should now have a tube that ends with a straight seam. |
| − | cover3.jpg|Pinch the fabric to separate the two sides of the cover. | + | cover3.jpg|Pinch the fabric on the flat sides to separate the two sides of the cover from one another. |
| − | cover4.jpg|You can fold the tip so that it looks like this by changing where the cover is folded. Rather than folding along the seam and the half-way point, the seam is now on the flat part and the fold is 1/4 of the way around the tube on either side. | + | cover4.jpg|You can fold the tip so that it looks like this by changing where the cover is folded. Rather than folding along the seam and the half-way point, the seam is now on the flat part and the fold is 1/4 of the way around the tube on either side. The tip should look like a double peak. |
| − | cover5.jpg|Open the tip up like this. | + | cover5.jpg|Open the tip up like this, so that one peak is up and the other down. |
| − | cover6.jpg|Now, draw a line. A bit of curve makes it nicer. | + | cover6.jpg|Now, draw a line across the peak, like a snowline on a mountain. A bit of curve makes it nicer. The line should cut off about this much (just under half) of the triangular tip. |
| − | cover7.jpg|Sew on that line and trim. I'm using an overlocker here, but it is the same procedure with a regular sewing machine or handsewing. | + | cover7.jpg|Sew on that line and trim the excess. I'm using an overlocker here, but it is the same procedure with a regular sewing machine or handsewing. |
| − | cover8.jpg|Do that for the other "dog | + | cover8.jpg|Do that for the other peak (these peaks are sometimes called "dog ears", especially on a finished cover). |
| − | cover9.jpg|Turn it right side out and put it on! If | + | cover9.jpg|Turn it right side out and put it on the stick! If there are still bothersome corners, get back in there and play with your seams until you're satisfied. You'll get the feel for it quickly. |
</gallery> | </gallery> | ||
| + | |||
| + | [[Category:Tutorials]] | ||
Latest revision as of 04:44, 17 February 2025
by Arrakis
Materials and Tools Needed
- an appropriate length of cloth. Cotton and Polycotton broadcloth and quilting cotton are generally good choices.
- a way to sew (machine, overlocker, handsewing supplies
- measuring tools (yardstick, quilting ruler, ruled cutting mat, etc.)
- cutting tools
Instructions

Measure around your omni with a tailor's measuring tape or with a string that you then measure with a ruler. Cut a rectangle of fabric at least 4" longer than the length you want to cover and 1/2" wider than your omni is around. (This assumes 1/4" seam allowance; adjust to your preferred seam allowance). Sew it up the long side to create an open tube. Test fit and resew the seam if needed to tighten the cover as desired. Finish the raw edge with a zigzag stitch or overlock or your favorite seam finish.
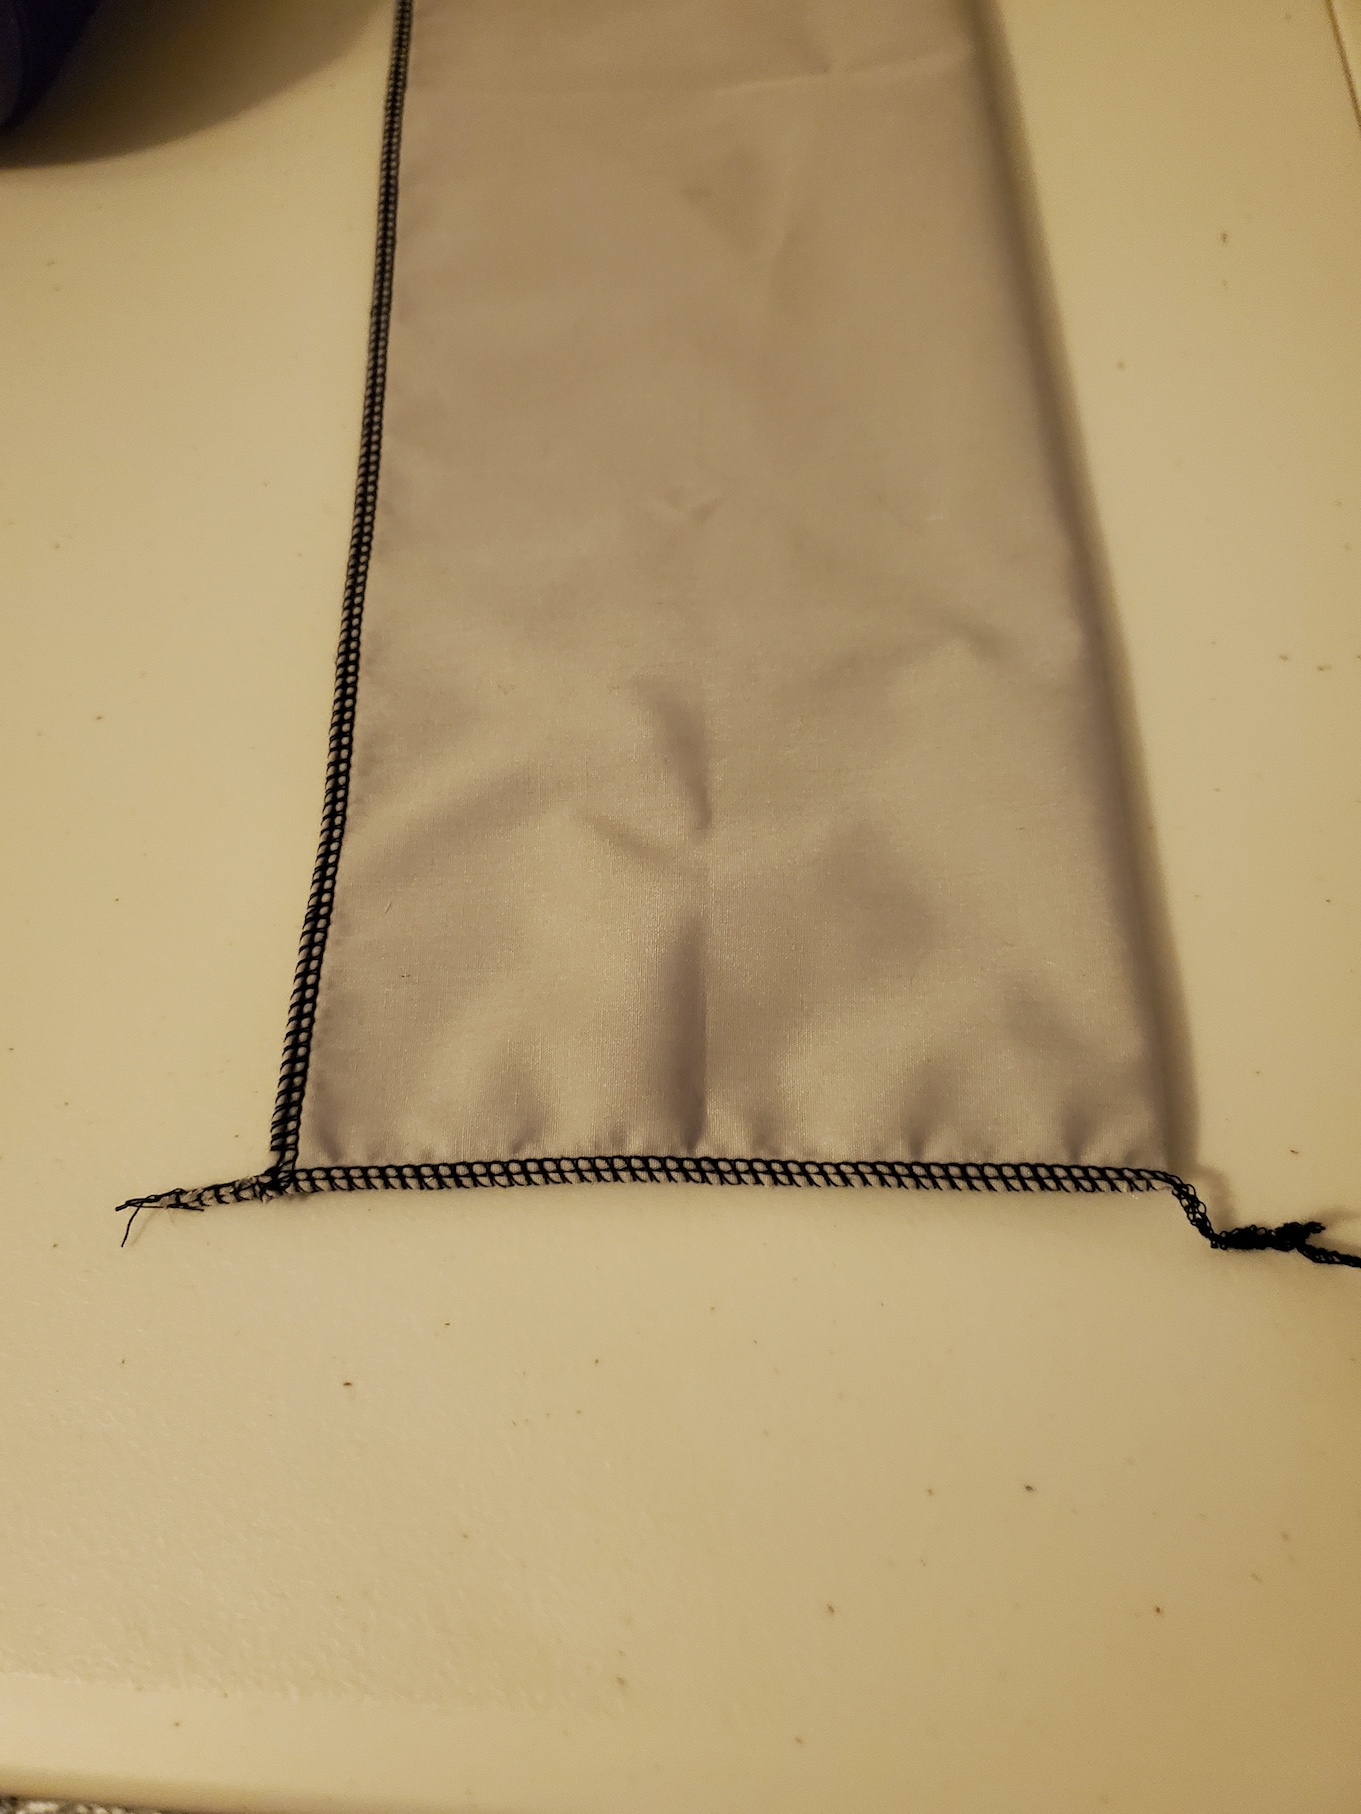
Sew straight across the tip from the seam to the fold to close it. You should now have a tube that ends with a straight seam.
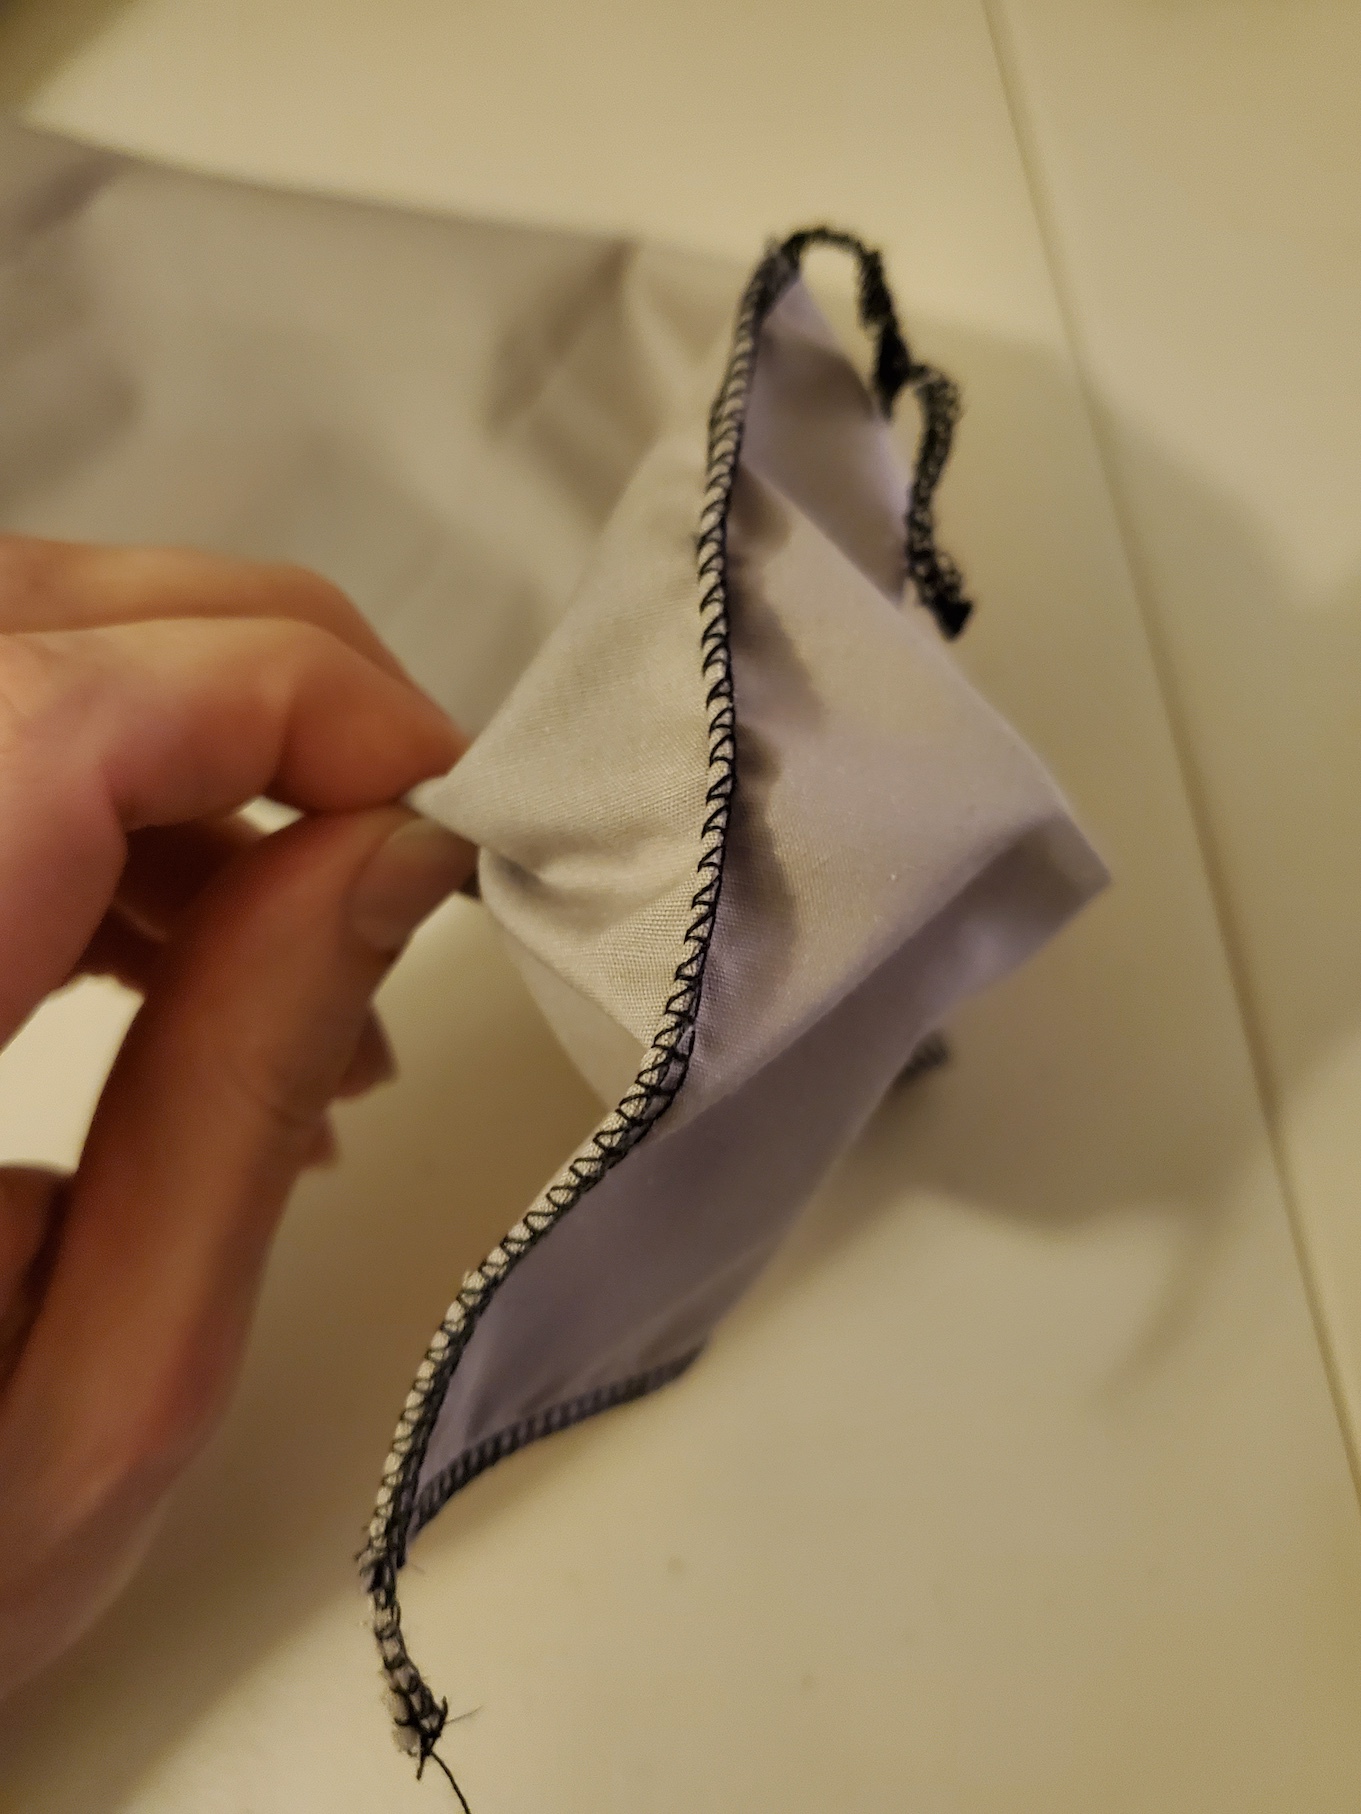
Pinch the fabric on the flat sides to separate the two sides of the cover from one another.
You can fold the tip so that it looks like this by changing where the cover is folded. Rather than folding along the seam and the half-way point, the seam is now on the flat part and the fold is 1/4 of the way around the tube on either side. The tip should look like a double peak.
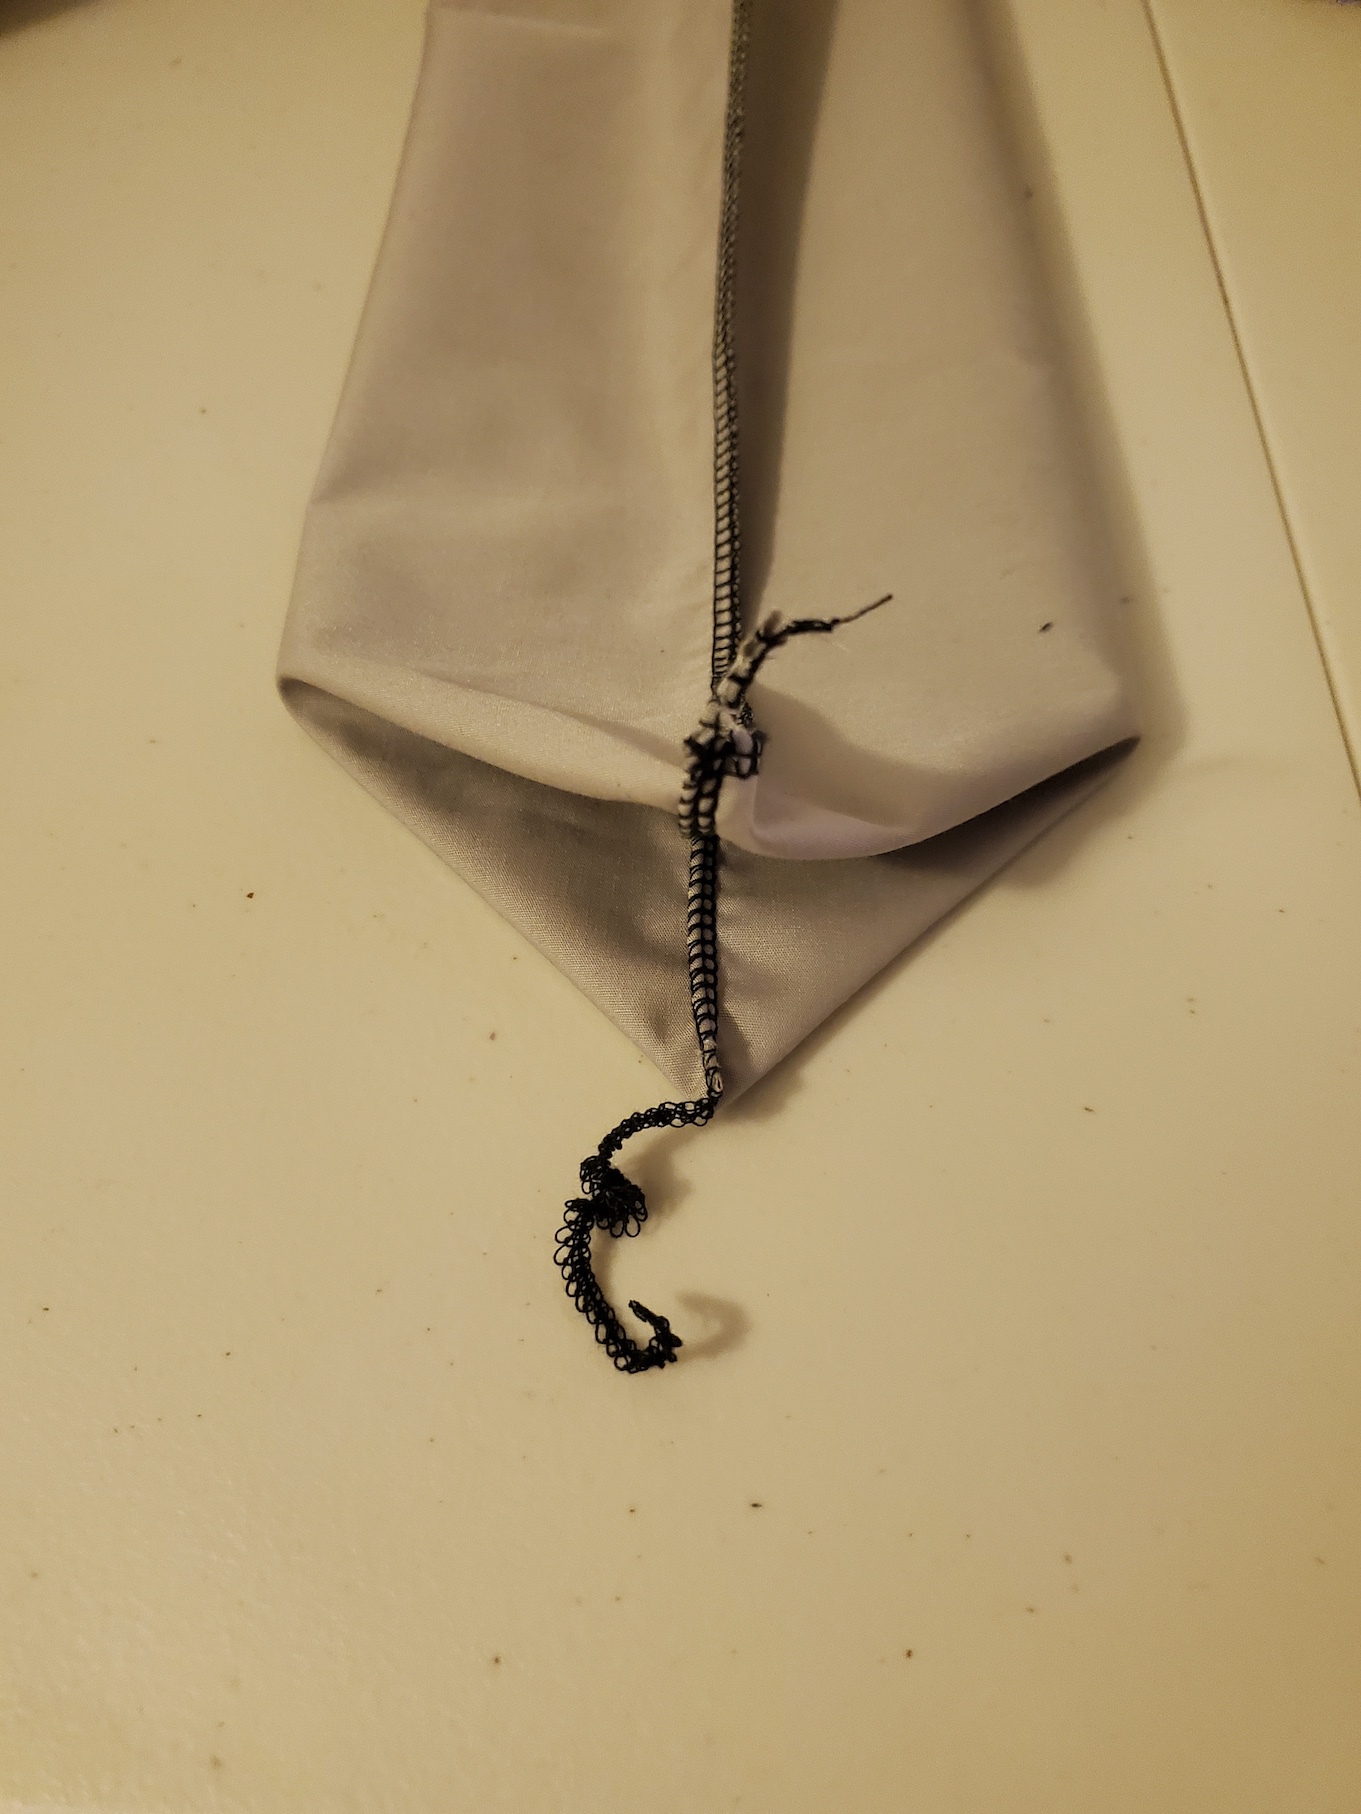
Open the tip up like this, so that one peak is up and the other down.
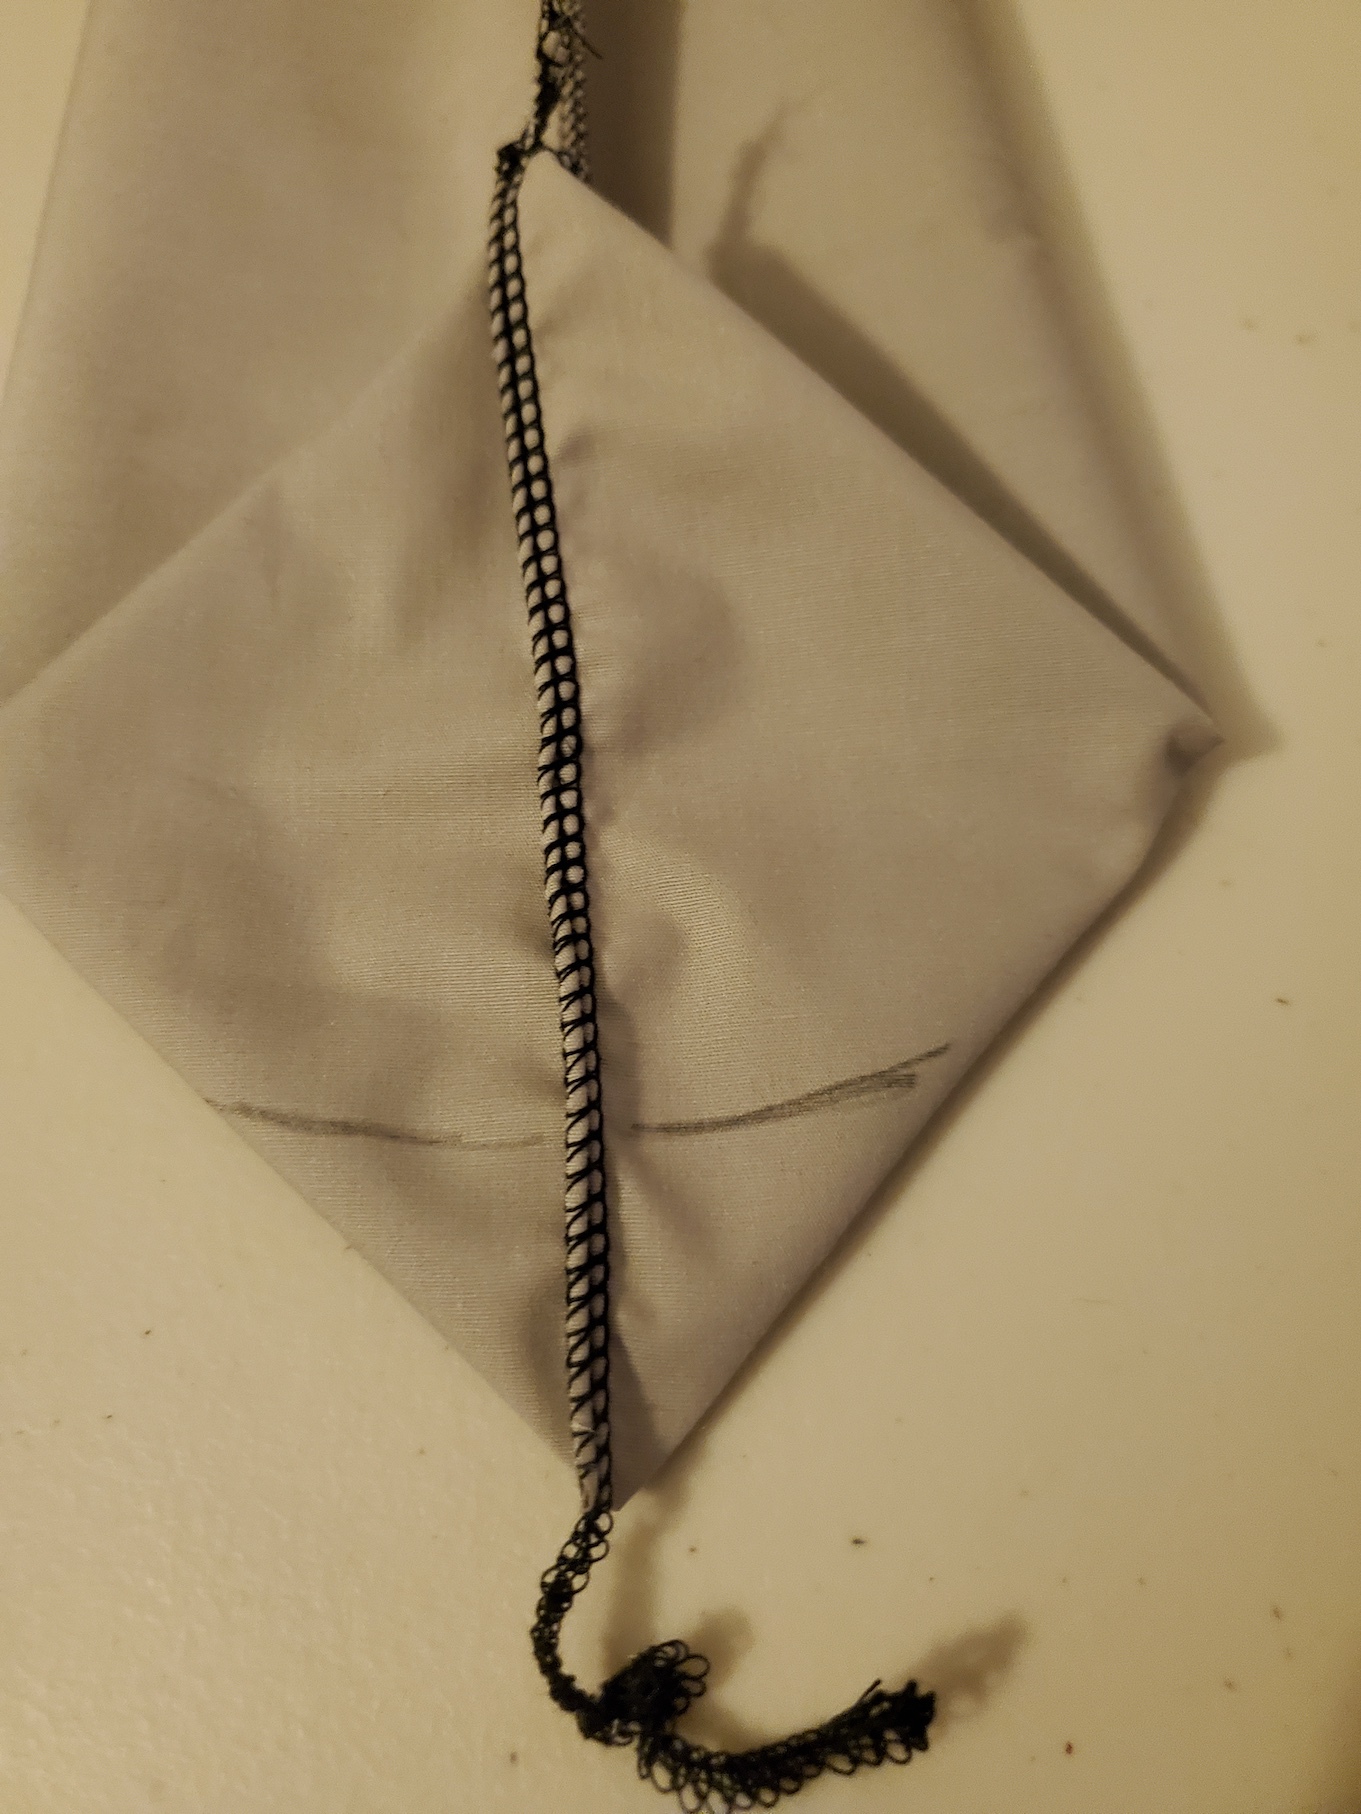
Now, draw a line across the peak, like a snowline on a mountain. A bit of curve makes it nicer. The line should cut off about this much (just under half) of the triangular tip.

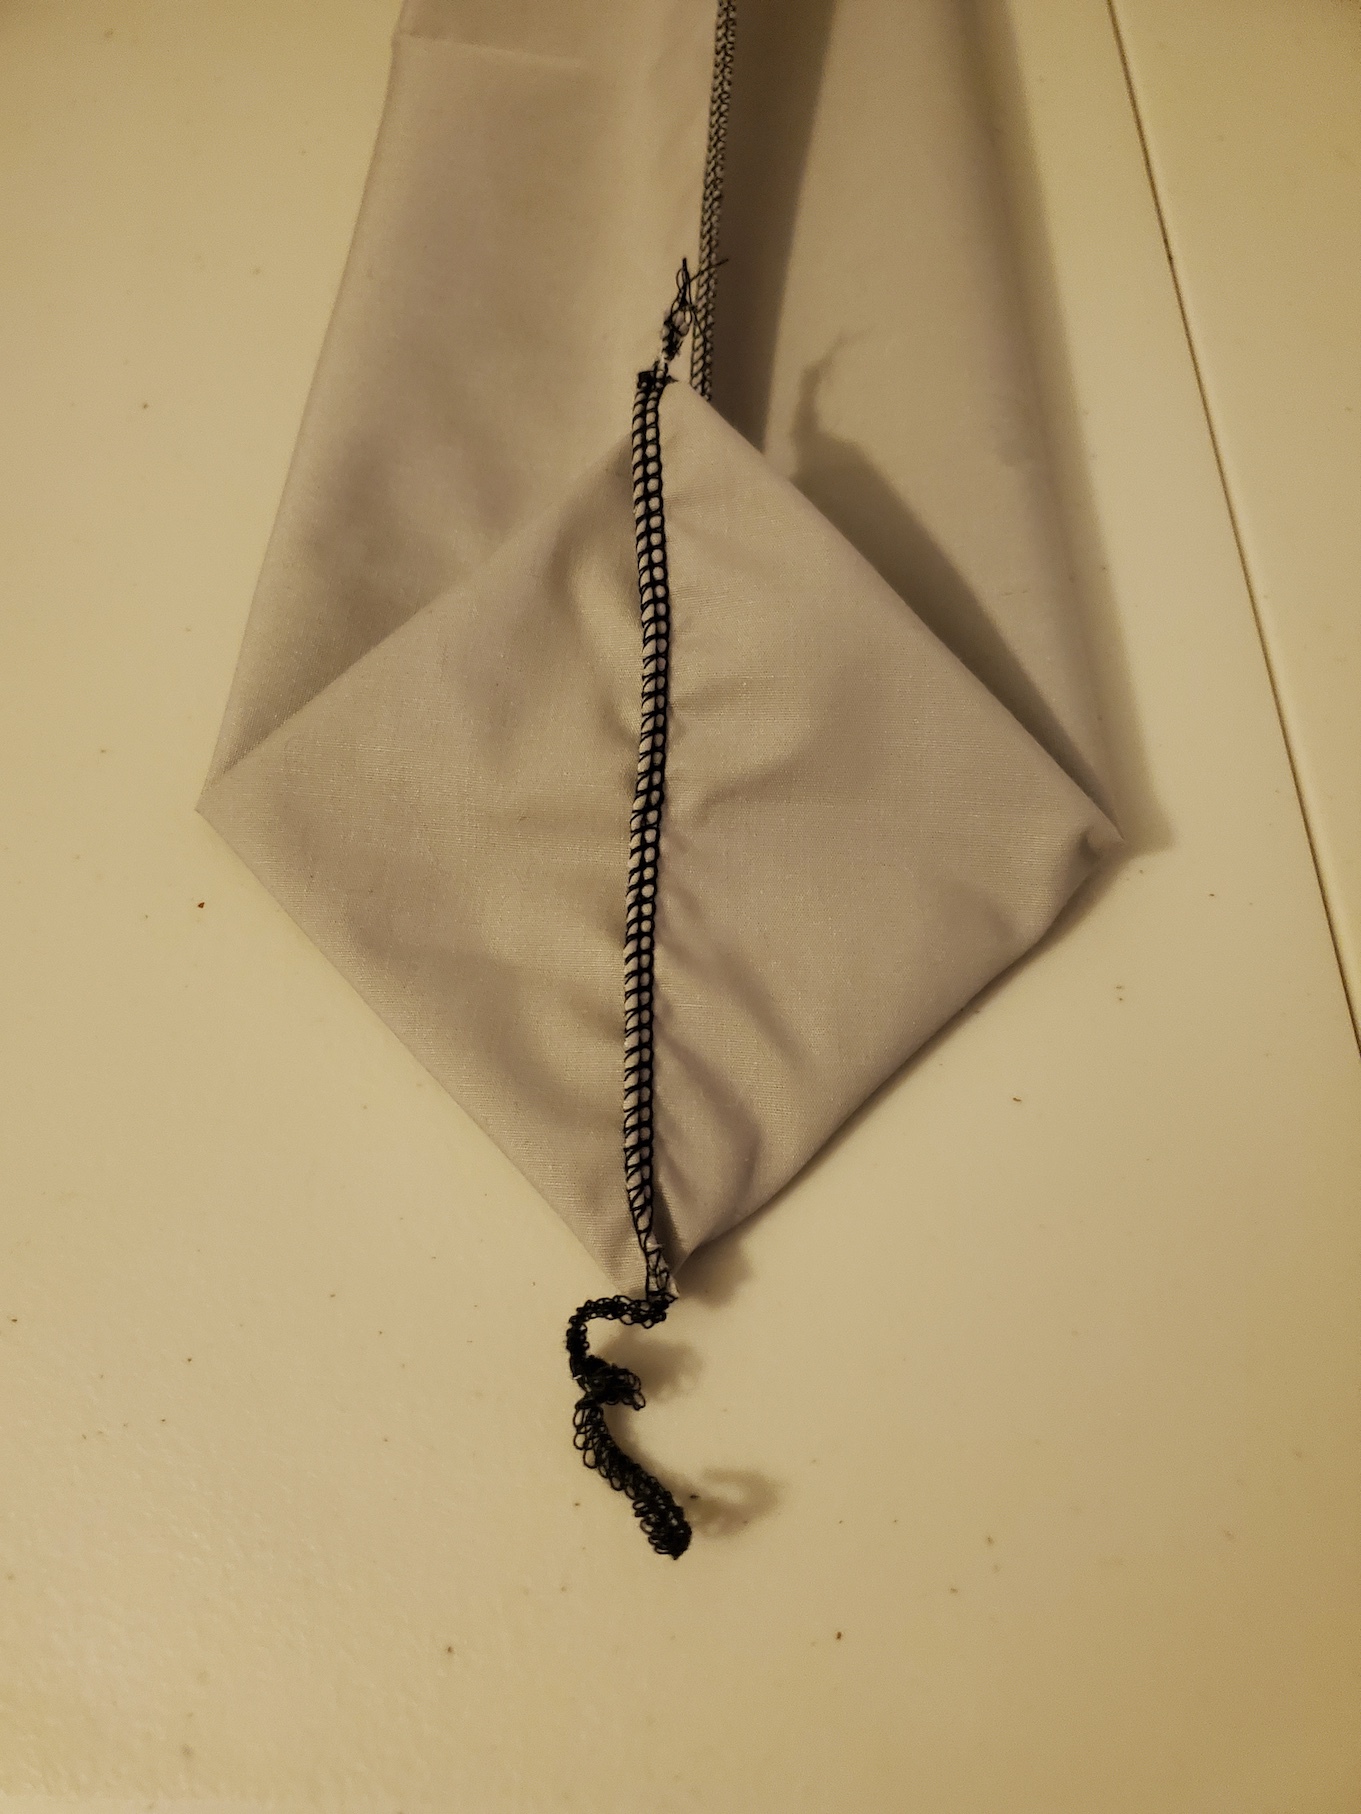
Sew on that line and trim the excess. I'm using an overlocker here, but it is the same procedure with a regular sewing machine or handsewing.
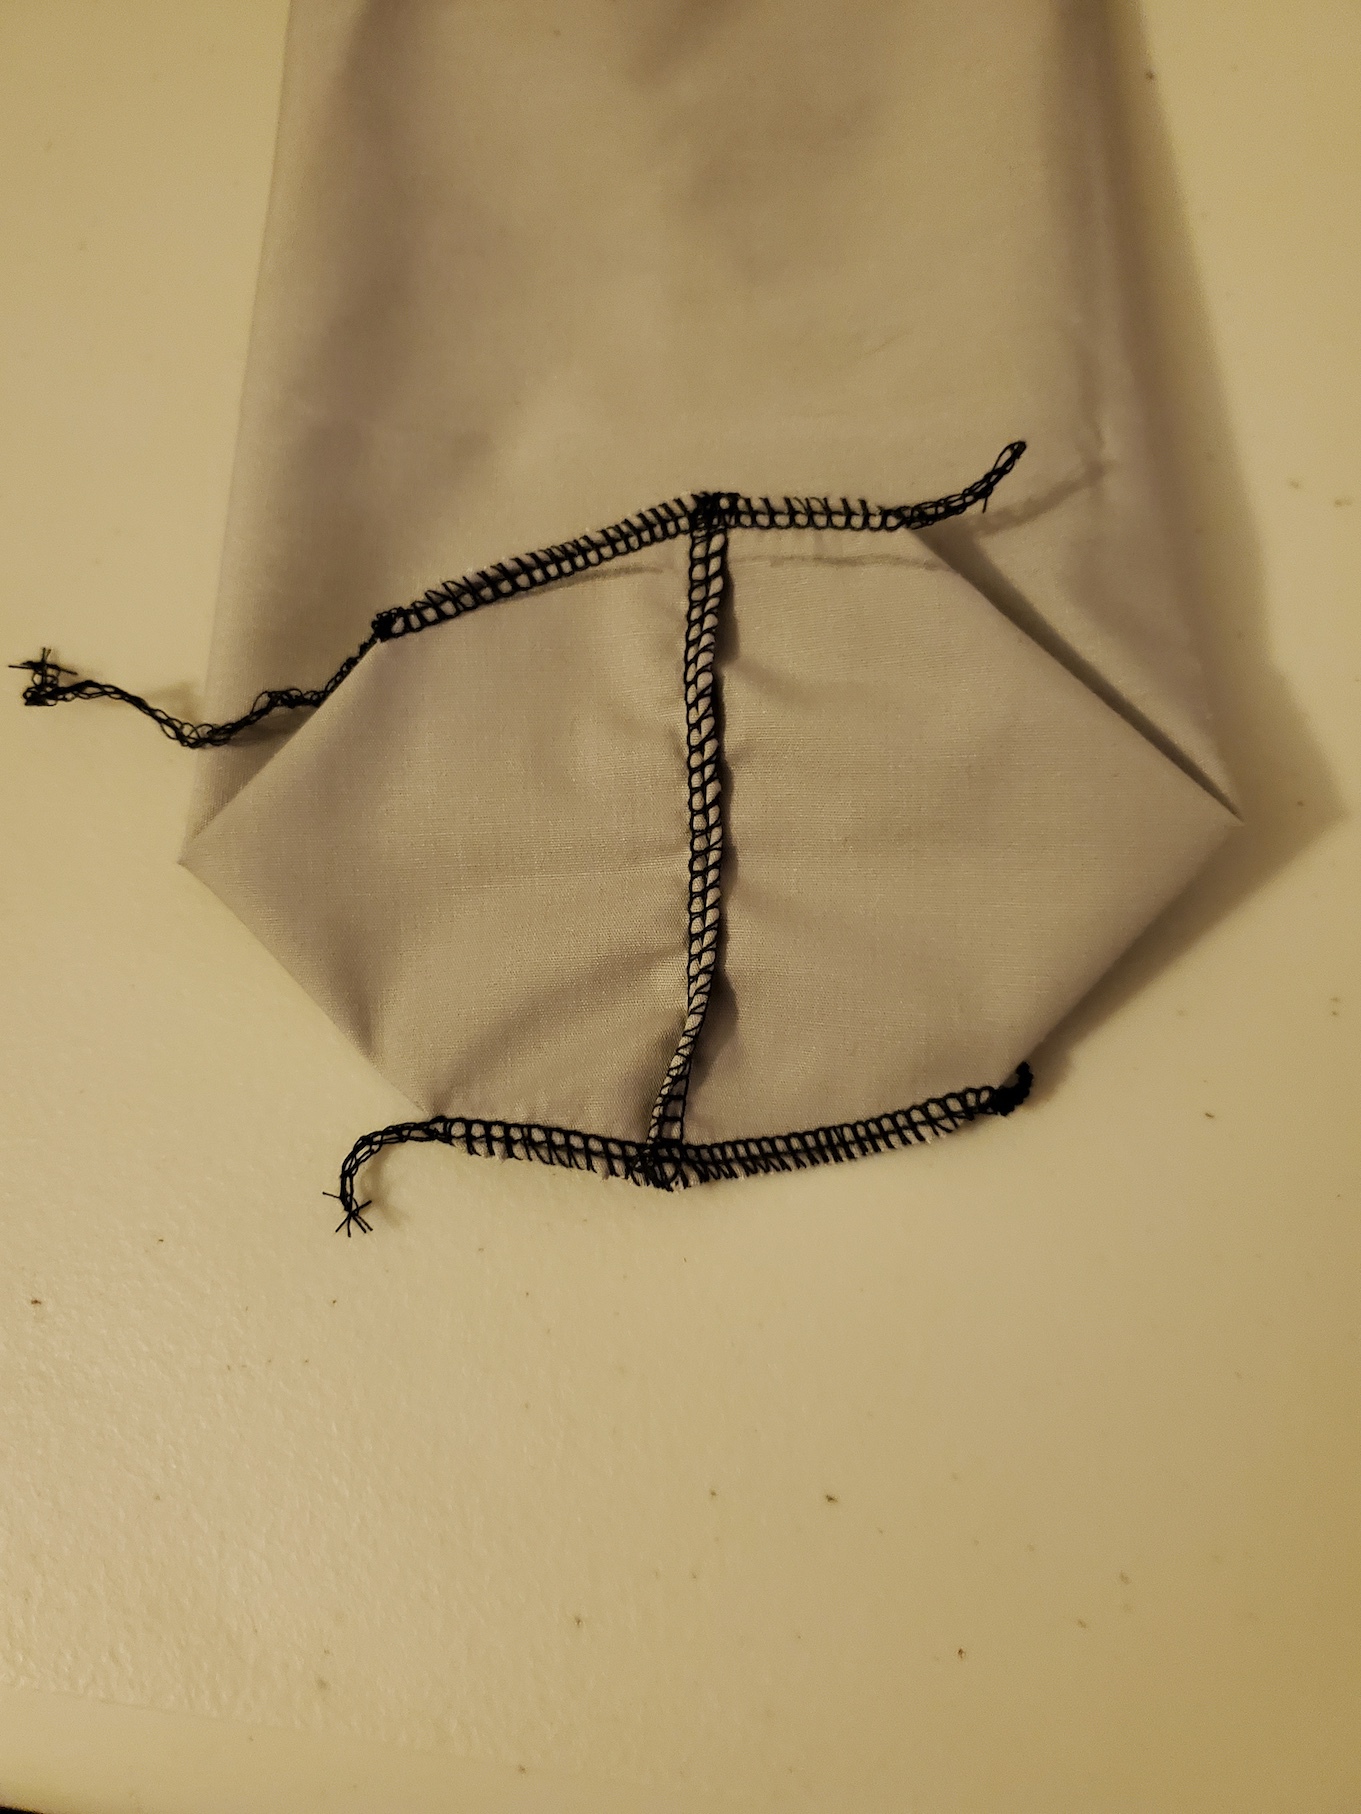
Do that for the other peak (these peaks are sometimes called "dog ears", especially on a finished cover).
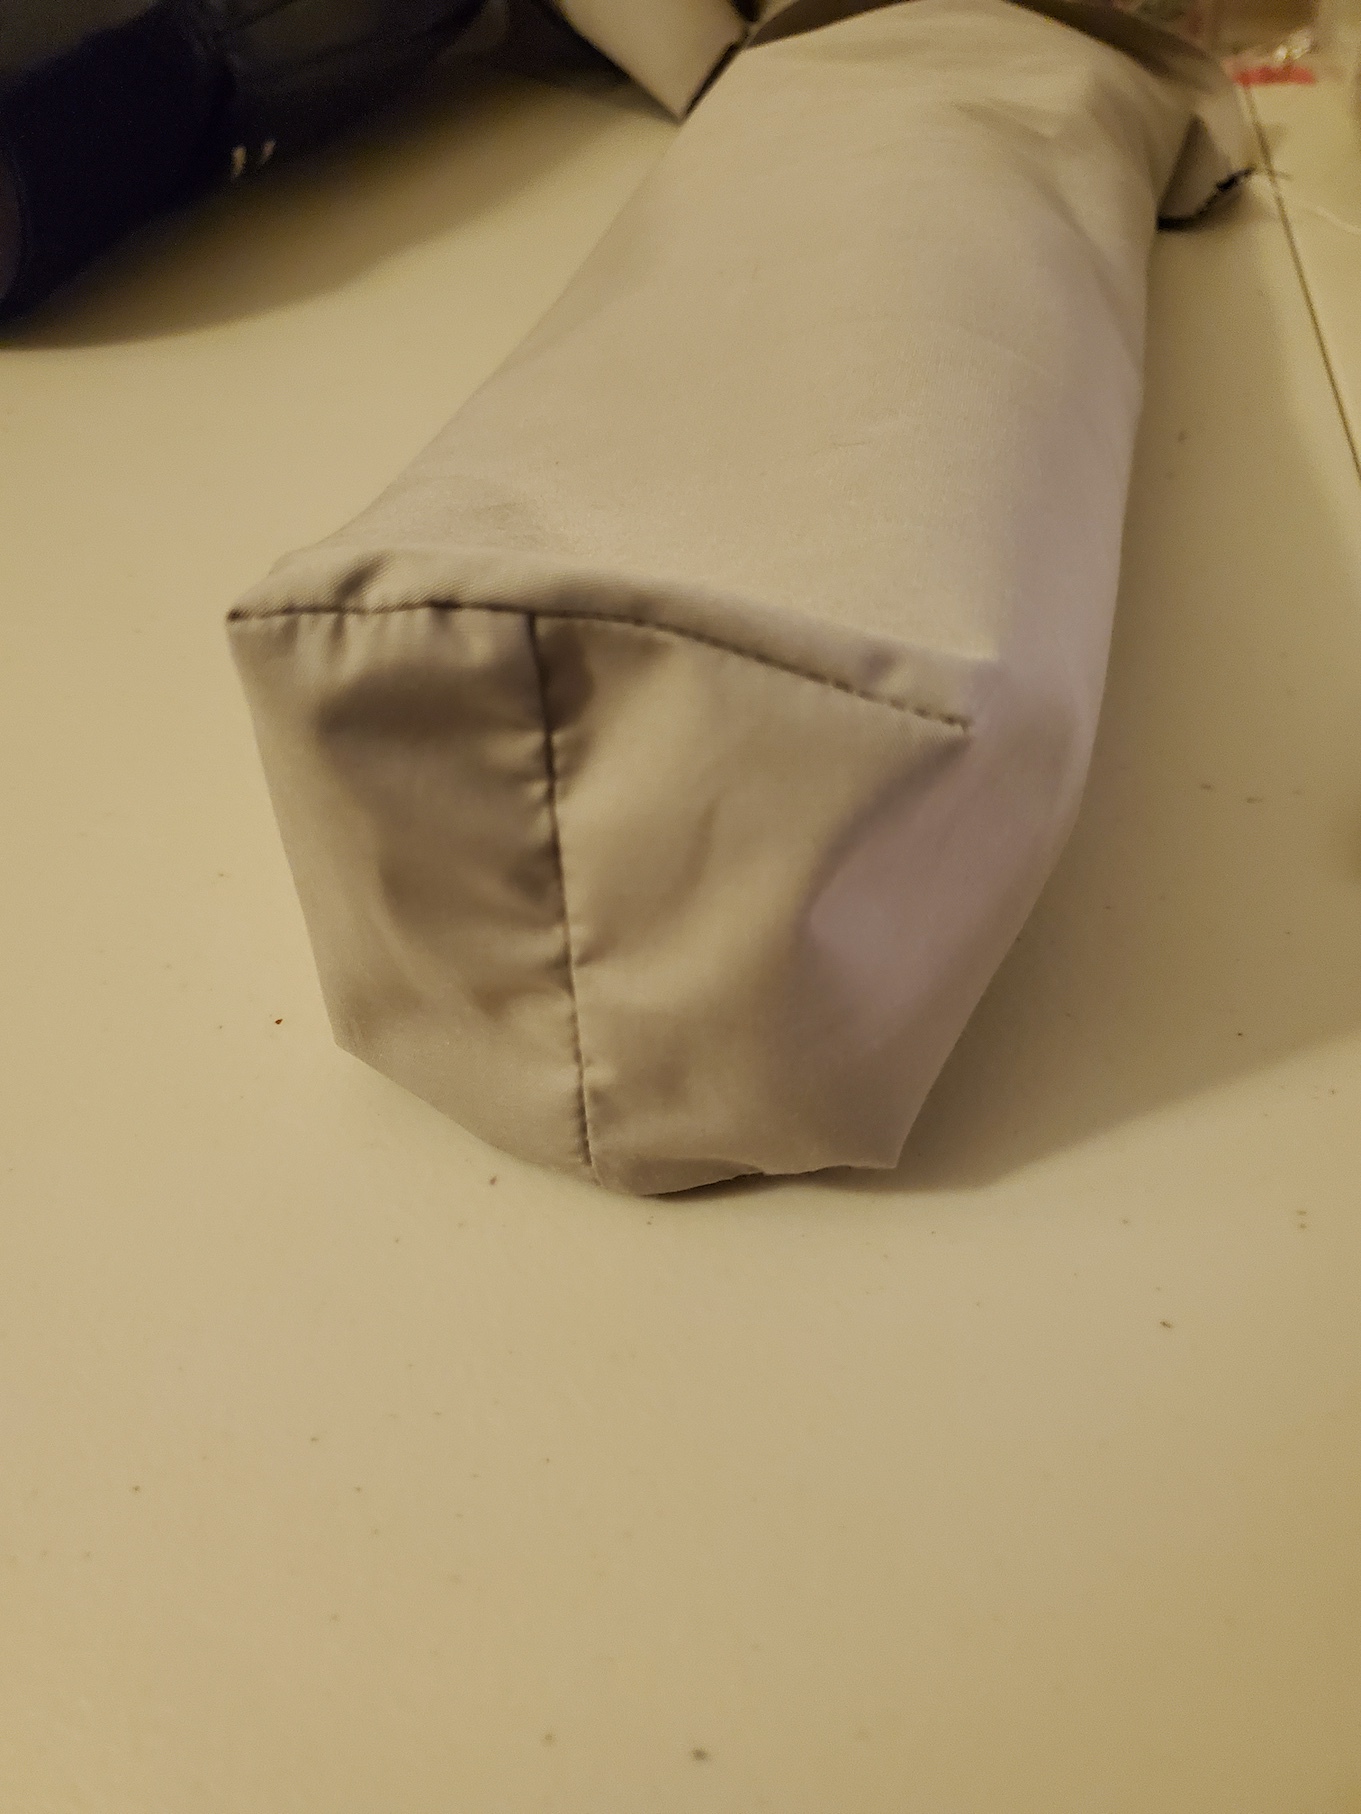
Turn it right side out and put it on the stick! If there are still bothersome corners, get back in there and play with your seams until you're satisfied. You'll get the feel for it quickly.


